Packet Tracer - Lab 1 : Basic switch setup | Đại học Kinh tế Kỹ thuật Công nghiệp

Sau khi hoàn thành các bước trên, bạn đã thực hiện thành công việc cấu hình cơ bản cho switch trong môi trường mạng sử dụng Cisco Packet Tracer. Bạn có thể mở rộng thêm các tính năng như tạo VLAN khác hoặc cấu hình DHCP sau này.

Môn:
Thông tin:
4 trang 3 tháng trước

Bình luận

Vui lòng đăng nhập hoặc đăng ký để gửi bình luận.

Packet Tracer - Lab 1 : Basic switch setup | Đại học Kinh tế Kỹ thuật Công nghiệp

Sau khi hoàn thành các bước trên, bạn đã thực hiện thành công việc cấu hình cơ bản cho switch trong môi trường mạng sử dụng Cisco Packet Tracer. Bạn có thể mở rộng thêm các tính năng như tạo VLAN khác hoặc cấu hình DHCP sau này.

43 22 lượt tải Tải xuống
lOMoARcPSD| 46884348
9/13/2020
Packet Tracer - Lab 1 : Basic switch setup - Packet Tracer Network
Packet Tracer - Lab 1 : Basic switch setup
Rating 3.00 (302 Votes)
Last Updated: Tuesday, 19 November 2019 20:46
Published: Tuesday, 07 September 2010
19:25 Written by PacketTracerNetwork
Introduction
A new switch just purchased from Cisco contains no default configuration. You need to configure the switch with setup
mode or from scratch using the command line interface (CLI) before connecting it in your network environment.
As a Cisco certified professional (CCENT or CCNA), it is very important to know the basic Cisco switch
configuration commands to improve the performances and the security of the enterprise network.
Write in clear, mistake-free English with
our free writing app. Try now!
DOWNLOAD
G
l
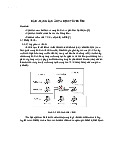
Network diagram
Lab instructions
This lab will test your ability to configure basic settings such as hostname, motd banner, encrypted
passwords, and terminal options on a Cisco Catalyst 2960 switch simulated in Packet Tracer 7.2.1.
1. Use the local laptop connect to the switch console and configure the laptop with the right
parameters for console access to the Cisco 2960 Catalyst switch
2. Configure Switch hostname as LOCAL-SWITCH
3. Configure the message of the day as "Unauthorized access is forbidden"
4. Configure the password for privileged mode access as "cisco". The password must be md5 encrypted
This website use cookies to make your browsing experience better. We use cookies to personalise content and ads, to provide social media features and to analyse our traffic.
We also share information about your use of our site with our social media, advertising and analytics partners. By using our site, you agree to our use of cookies.
I understand
https://www.packettracernetwork.com/labs/lab1-basicswitchsetup.html
1/4
lOMoARcPSD| 46884348
9/13/2020
Packet Tracer - Lab 1 : Basic switch setup - Packet Tracer Network
5. Configure password encryption on the switch using the global configuration command
6. Configure CONSOLE access with the following settings :
- Login enabled
- Password : ciscoconsole
- History size : 15 commands
- Timeout : 6'45''
- Synchronous logging
6. Configure TELNET access with the following
settings : - Login enabled
- Password : ciscotelnet
- History size : 15 commands
- Timeout : 8'20''
- Synchronous logging
7. Configure the IP address of the switch as 192.168.1.2/24 and it's default gateway IP (192.168.1.1).
8. Test telnet connectivity from the Remote Laptop using the telnet client.
Lab solution
Configure Switch hostname as LOCAL-SWITCH
Switch(config)#hostname LOCAL-SWITCH
Configure the message of the day as "Unauthorized access is forbidden"
Switch(config)#banner motd #
Unauthorized access is forbidden#
Configure the password for privileged mode access as "cisco". The password must be md5 encrypted
Switch(config)#enable secret cisco
Configure password encryption on the switch using the global configuration command
Switch(config)#service password-encryption
Configure CONSOLE access [...]
Switch(config)#line con 0
Switch(config-line)#password ciscoconsole
Switch(config-line)#logging synchronous
Switch(config-line)#login
Switch(config-line)#history size 15
Switch(config-line)#exec-timeout 6 45
This
Configure
websiteuse cookies
TELNET
to make
access
your
[...
browsing
]
experience better. We use cookies to personalise content and ads, to provide social media features and to analyse our traffic. We also share information about
your use of our site with our social media, advertising and analytics partners. By using our site, you agree to our use of cookies.
I understand
https://www.packettracernetwork.com/labs/lab1-basicswitchsetup.html
2/4
lOMoARcPSD| 46884348
9/13/2020
Packet Tracer - Lab 1 : Basic switch setup - Packet Tracer Network
Switch(config)#line vty 0 15
Switch(config-line)#exec-timeout 8 20
Switch(config-line)#password ciscotelnet
Switch(config-line)#logging synchronous
Switch(config-line)#login
Switch(config-line)#history size 15
Configure the IP address of the switch as 192.168.1.2/24 and it's default gateway IP (192.168.1.1).
Switch(config)#interface Vlan1
Switch(config-if)#ip address 192.168.1.2 255.255.255.0
Switch(config-if)#ip default-gateway 192.168.1.1
Trademark notice : This web site and/or material is not affiliated with, endorsed by, or sponsored by Cisco Systems, Inc. Cisco, Cisco Systems, Cisco IOS, CCNA, CCNP, Ne Academy, Linksys are registered trademarks of Cisco Systems, Inc. or its affiliates in the U.S. or certain other countries.
This website use cookies to make your browsing experience better. We use cookies to personalise content and ads, to provide social media features and to analyse our traffic.
We also share information about your use of our site with our social media, advertising and analytics partners. By using our site, you agree to our use of cookies.
I understand
https://www.packettracernetwork.com/labs/lab1-basicswitchsetup.html
3/4
lOMoARcPSD| 46884348
9/13/2020
Packet Tracer - Lab 1 : Basic switch setup - Packet Tracer Network
| 1/4

Preview text:

lOMoAR cPSD| 46884348 9/13/2020
Packet Tracer - Lab 1 : Basic switch setup - Packet Tracer Network
Packet Tracer - Lab 1 : Basic switch setup
Rating 3.00 (302 Votes)
Last Updated: Tuesday, 19 November 2019 20:46
Published: Tuesday, 07 September 2010
19:25 Written by PacketTracerNetwork Introduction
A new switch just purchased from Cisco contains no default configuration. You need to configure the switch with setup
mode or from scratch using the command line interface (CLI) before connecting it in your network environment.
As a Cisco certified professional (CCENT or CCNA), it is very important to know the basic Cisco switch
configuration commands to improve the performances and the security of the enterprise network.
Write in clear, mistake-free English with
our free writing app. Try now! DOWNLOAD G l Network diagram Lab instructions
This lab will test your ability to configure basic settings such as hostname, motd banner, encrypted
passwords, and terminal options on a Cisco Catalyst 2960 switch simulated in Packet Tracer 7.2.1.
1. Use the local laptop connect to the switch console and configure the laptop with the right
parameters for console access to the Cisco 2960 Catalyst switch
2. Configure Switch hostname as LOCAL-SWITCH
3. Configure the message of the day as "Unauthorized access is forbidden"
4. Configure the password for privileged mode access as "cisco". The password must be md5 encrypted
This website use cookies to make your browsing experience better. We use cookies to personalise content and ads, to provide social media features and to analyse our traffic.
We also share information about your use of our site with our social media, advertising and analytics partners. By using our site, you agree to our use of cookies. I understand
https://www.packettracernetwork.com/labs/lab1-basicswitchsetup.html 1/4 lOMoAR cPSD| 46884348 9/13/2020
Packet Tracer - Lab 1 : Basic switch setup - Packet Tracer Network
5. Configure password encryption on the switch using the global configuration command
6. Configure CONSOLE access with the following settings : - Login enabled
- Password : ciscoconsole
- History size : 15 commands - Timeout : 6'45'' - Synchronous logging
6. Configure TELNET access with the following settings : - Login enabled - Password : ciscotelnet
- History size : 15 commands - Timeout : 8'20'' - Synchronous logging
7. Configure the IP address of the switch as 192.168.1.2/24 and it's default gateway IP (192.168.1.1).
8. Test telnet connectivity from the Remote Laptop using the telnet client. Lab solution
Configure Switch hostname as LOCAL-SWITCH
Switch(config)#hostname LOCAL-SWITCH
Configure the message of the day as "Unauthorized access is forbidden" Switch(config)#banner motd #
Unauthorized access is forbidden#
Configure the password for privileged mode access as "cisco". The password must be md5 encrypted
Switch(config)#enable secret cisco
Configure password encryption on the switch using the global configuration command
Switch(config)#service password-encryption
Configure CONSOLE access [...] Switch(config)#line con 0
Switch(config-line)#password ciscoconsole
Switch(config-line)#logging synchronous Switch(config-line)#login
Switch(config-line)#history size 15
Switch(config-line)#exec-timeout 6 45
ThisConfigurewebsiteuse cookiesTELNETto makeaccessyour[...browsing] experience better. We use cookies to personalise content and ads, to provide social media features and to analyse our traffic. We also share information about
your use of our site with our social media, advertising and analytics partners. By using our site, you agree to our use of cookies. I understand
https://www.packettracernetwork.com/labs/lab1-basicswitchsetup.html 2/4 lOMoAR cPSD| 46884348 9/13/2020
Packet Tracer - Lab 1 : Basic switch setup - Packet Tracer Network Switch(config)#line vty 0 15
Switch(config-line)#exec-timeout 8 20
Switch(config-line)#password ciscotelnet
Switch(config-line)#logging synchronous Switch(config-line)#login
Switch(config-line)#history size 15
Configure the IP address of the switch as 192.168.1.2/24 and it's default gateway IP (192.168.1.1).
Switch(config)#interface Vlan1
Switch(config-if)#ip address 192.168.1.2 255.255.255.0
Switch(config-if)#ip default-gateway 192.168.1.1
Trademark notice : This web site and/or material is not affiliated with, endorsed by, or sponsored by Cisco Systems, Inc. Cisco, Cisco Systems, Cisco IOS, CCNA, CCNP, Ne Academy, Linksys are registered trademarks of Cisco Systems, Inc. or its affiliates in the U.S. or certain other countries.
This website use cookies to make your browsing experience better. We use cookies to personalise content and ads, to provide social media features and to analyse our traffic.
We also share information about your use of our site with our social media, advertising and analytics partners. By using our site, you agree to our use of cookies. I understand
https://www.packettracernetwork.com/labs/lab1-basicswitchsetup.html 3/4 lOMoAR cPSD| 46884348 9/13/2020
Packet Tracer - Lab 1 : Basic switch setup - Packet Tracer Network