Tài liệu Môn Computer Science | Trường Đại học Quốc tế, Đại học Quốc gia Thành phố Hồ Chí Minh
Tài liệu Môn Computer Science. Tài liệu được sưu tầm gồm 13 trang, giúp bạn ôn tập tốt hơn. Mời các bạn đón xem.
Môn: Computer Science 10 tài liệu
Trường: Trường Đại học Quốc tế, Đại học Quốc gia Thành phố Hồ Chí Minh 1.9 K tài liệu
Tác giả:


Preview text:
lOMoAR cPSD| 59078336 Algonquin College
of Applied Arts and Technology CST2355 – Database Systems Individual Lab Assignment 2a
Student Name: Hoang Anh Nguyen Student ID: 041099695 Student email: nguy1050@algonquinlive.com Hand-in:
1. The lab assignment will be graded out of a maximum 3 points. (a maximum of 1.5 points for
the portion handed in during the lab session, and an additional 1.5 points for the portion
handed in before the due date.)
2. This template should be used to submit your lab assignment. That means you should
save a copy of these instructions and then add your screenshots and other notes to that
copy. Then submit the updated version to Brightspace. This will thoroughly document
your work and make it much easier to review before the midterm test.
3. Make sure you have enough screenshots to completely document that you have completed all the steps. Activities (Steps):
1. Make sure you have signed the attendance sheet for your lab session! (Otherwise, you will
receive a grade of 0 for this lab.)
1.1. You also need to submit a version of the lab assignment submission before the end of
the lab session that includes all activities up to and including step 7 in order to receive a
grade on the first part of this individual lab. You will be able to hand in a complete,
carefully documented, version of the entire lab (including step 9) up to the Brightspace
due date – that is the upcoming Sunday September 24 at 11:59pm.
2. Receive your updated lab instructions from your lab instructor at the beginning of the lab session and enter them here:
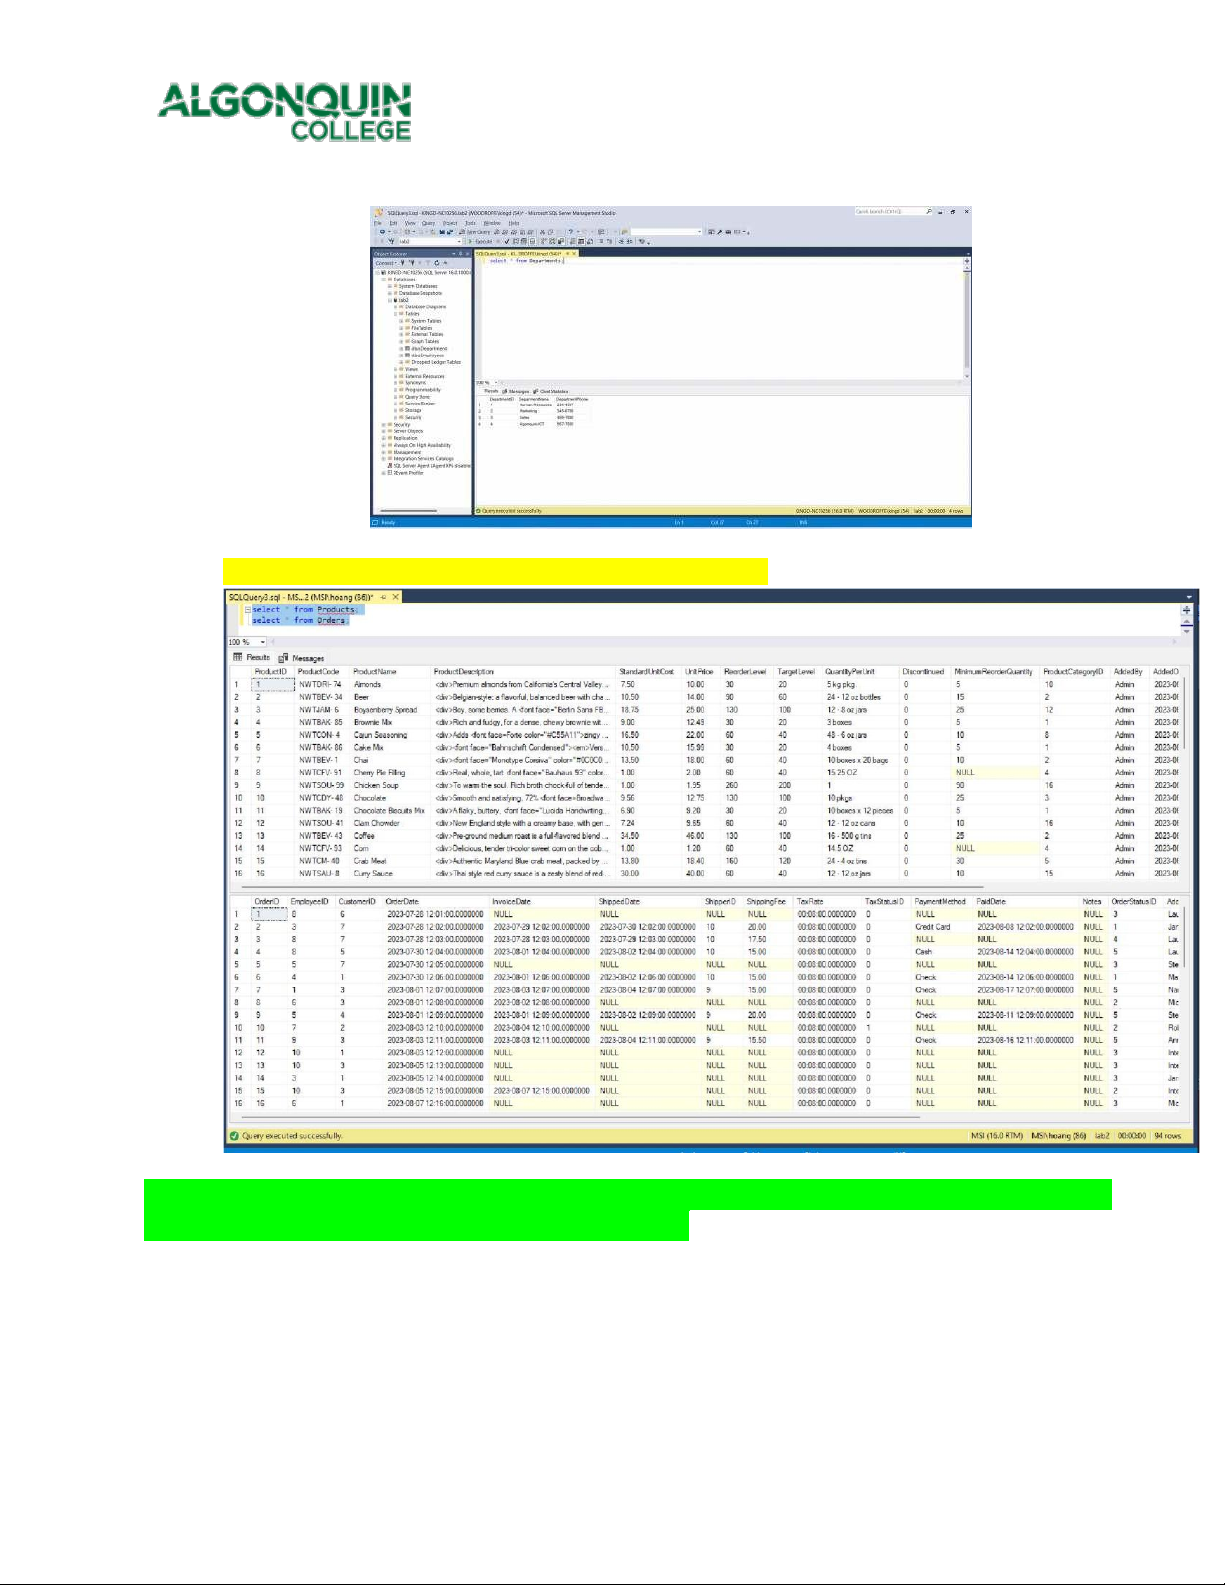
2.1. Special table name(s):__ ____Products, Orders_____________________________
2.2. Special field name(s):__ _________________________________
2.3. Detailed instructions: lOMoAR cPSD| 59078336 Algonquin College
of Applied Arts and Technology
3. In this lab you will be using the Microsoft SQL Server 2019 database management system, and
the MS SQL Server Management Studio (Version 19). The first step is to get the software installed.
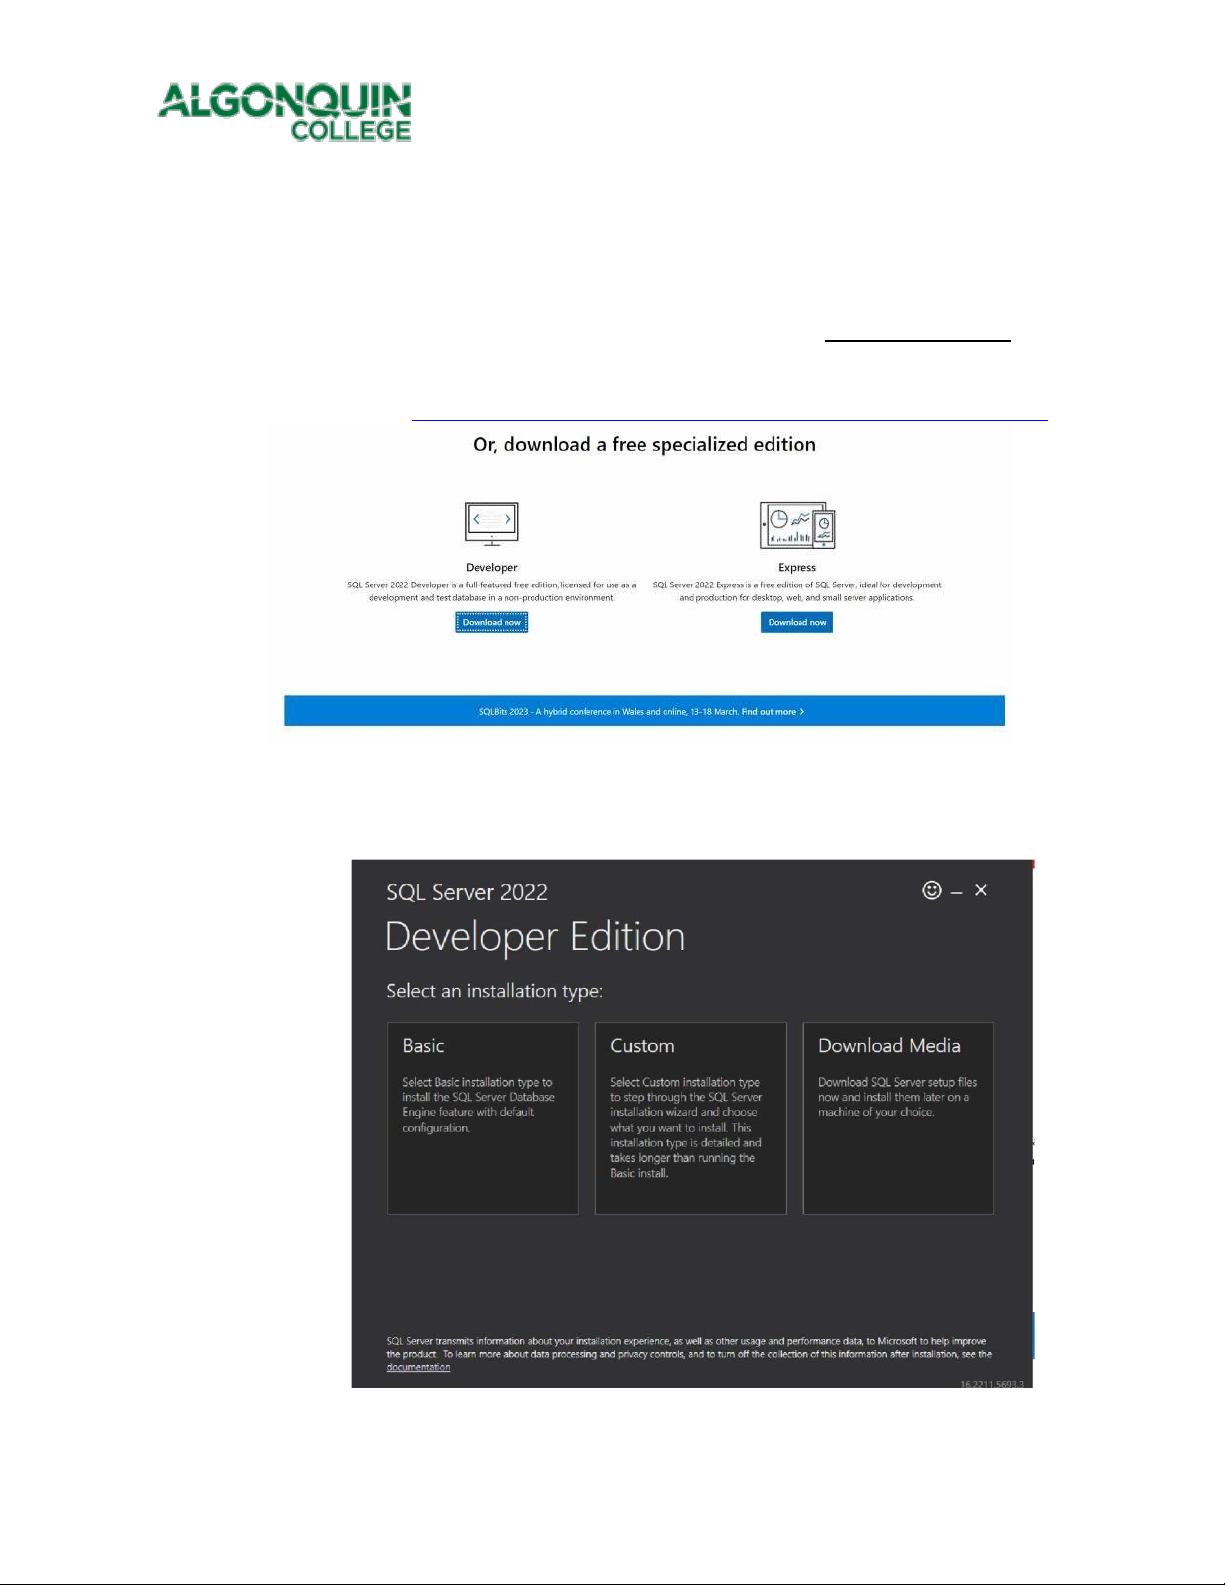
3.1. Follow the instructions below to install MS SQL Server 2022 (Developer Edition) and the
SQL Server Management Studio 19
3.1.1. Navigate to: https://www.microsoft.com/en-ca/sql-server/sql-server-downloads
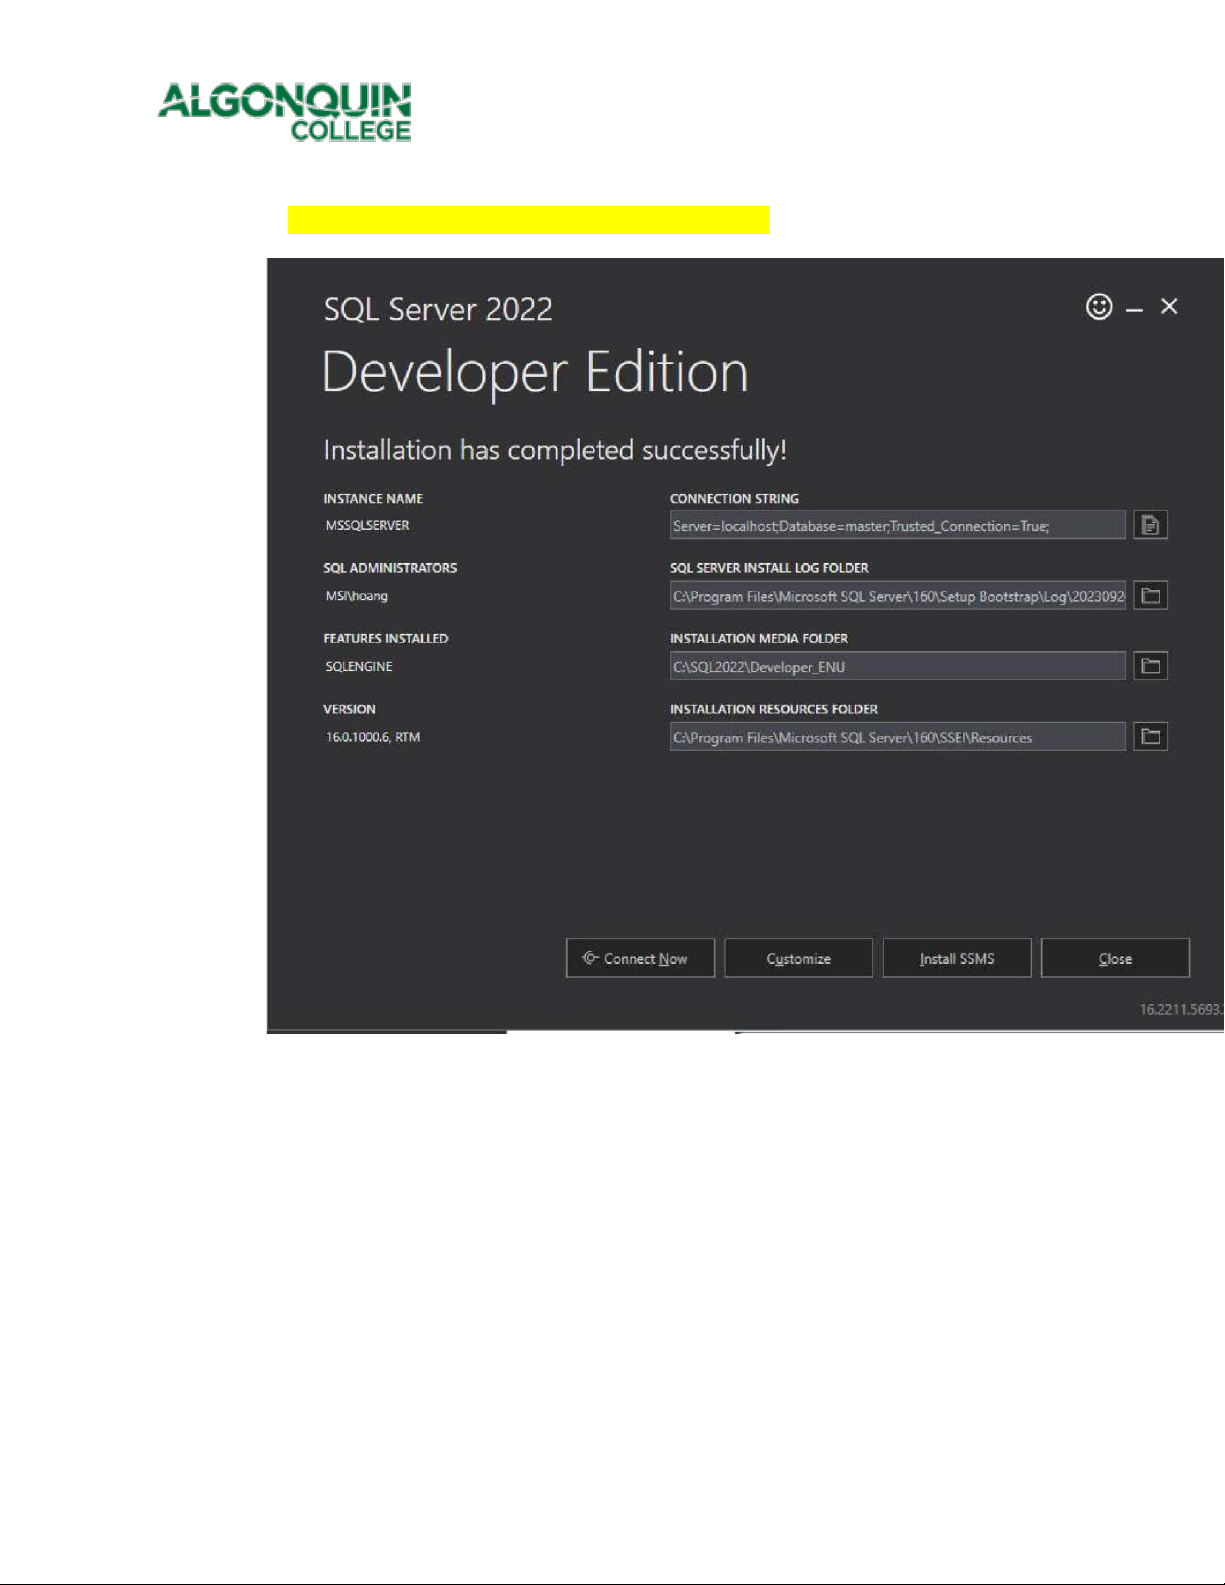
3.1.2. NOTE: Make sure you take a screenshot of the confirmation screen that shows all of
the configuration folders, when you download and install the Developer edition –
Basic Install. (Use the “Basic” installation configuration). lOMoAR cPSD| 59078336 Algonquin College
of Applied Arts and Technology
3.1.3. Paste YOUR installation confirmation screen here:
4. On the confirmation screen, select “Install SSMS” to install the SQL Server Management Studio.
4.1. You need to download Version 19 or later and then run the setup file.
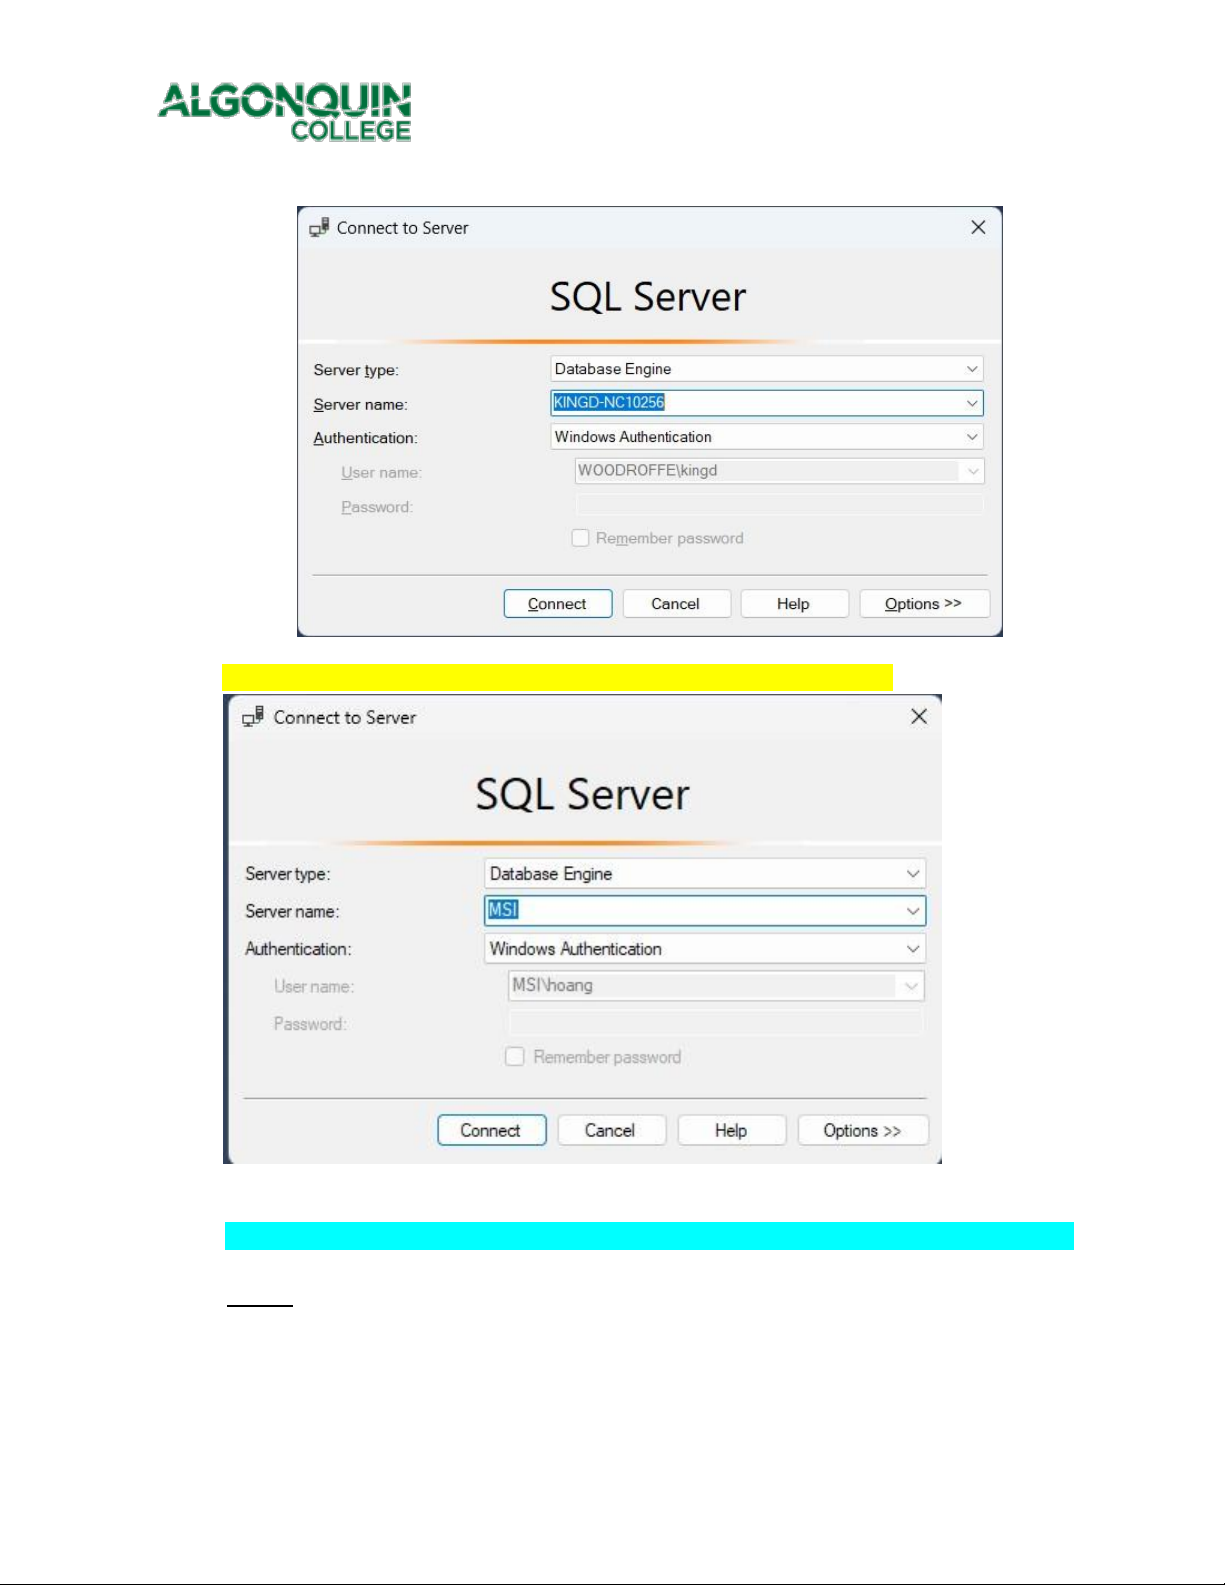
5. When complete, open the SQL Server Management Studio in Windows.
5.1. The first time you open the tool, save the launch screen – it shows your instance name. Hereis mine. lOMoAR cPSD| 59078336 Algonquin College
of Applied Arts and Technology
5.2. Paste your screen here – it is useful because it shows the server name:
6. We are going to import our “Departments” and “Employees” tables from Microsoft Access (lab
1). (Note: the lab professor may require you to use a different table and/or field – see step 2.)
The simplest way to do this without any glitches from version mismatches and missing adapters
is to export the data from Microsoft Access into separate Microsoft Excel or .csv
(commaseparated-value) text files and then import those files into SQL Server: as follows;
6.1. Open your lab 1 version of the Northwind database that contains the “Departments” table
and your updated “Employees” table. lOMoAR cPSD| 59078336 Algonquin College
of Applied Arts and Technology
6.2. Select the “Departments” table and then right mouse click and select the “Export ->Text
File” option from the Develop Menu. (See below)
6.3. You will then be prompted as follows…
6.4. DO NOT select the export data with formatting and layout. Then when you click OK you
will get prompted for delimiter options…. lOMoAR cPSD| 59078336 Algonquin College
of Applied Arts and Technology it
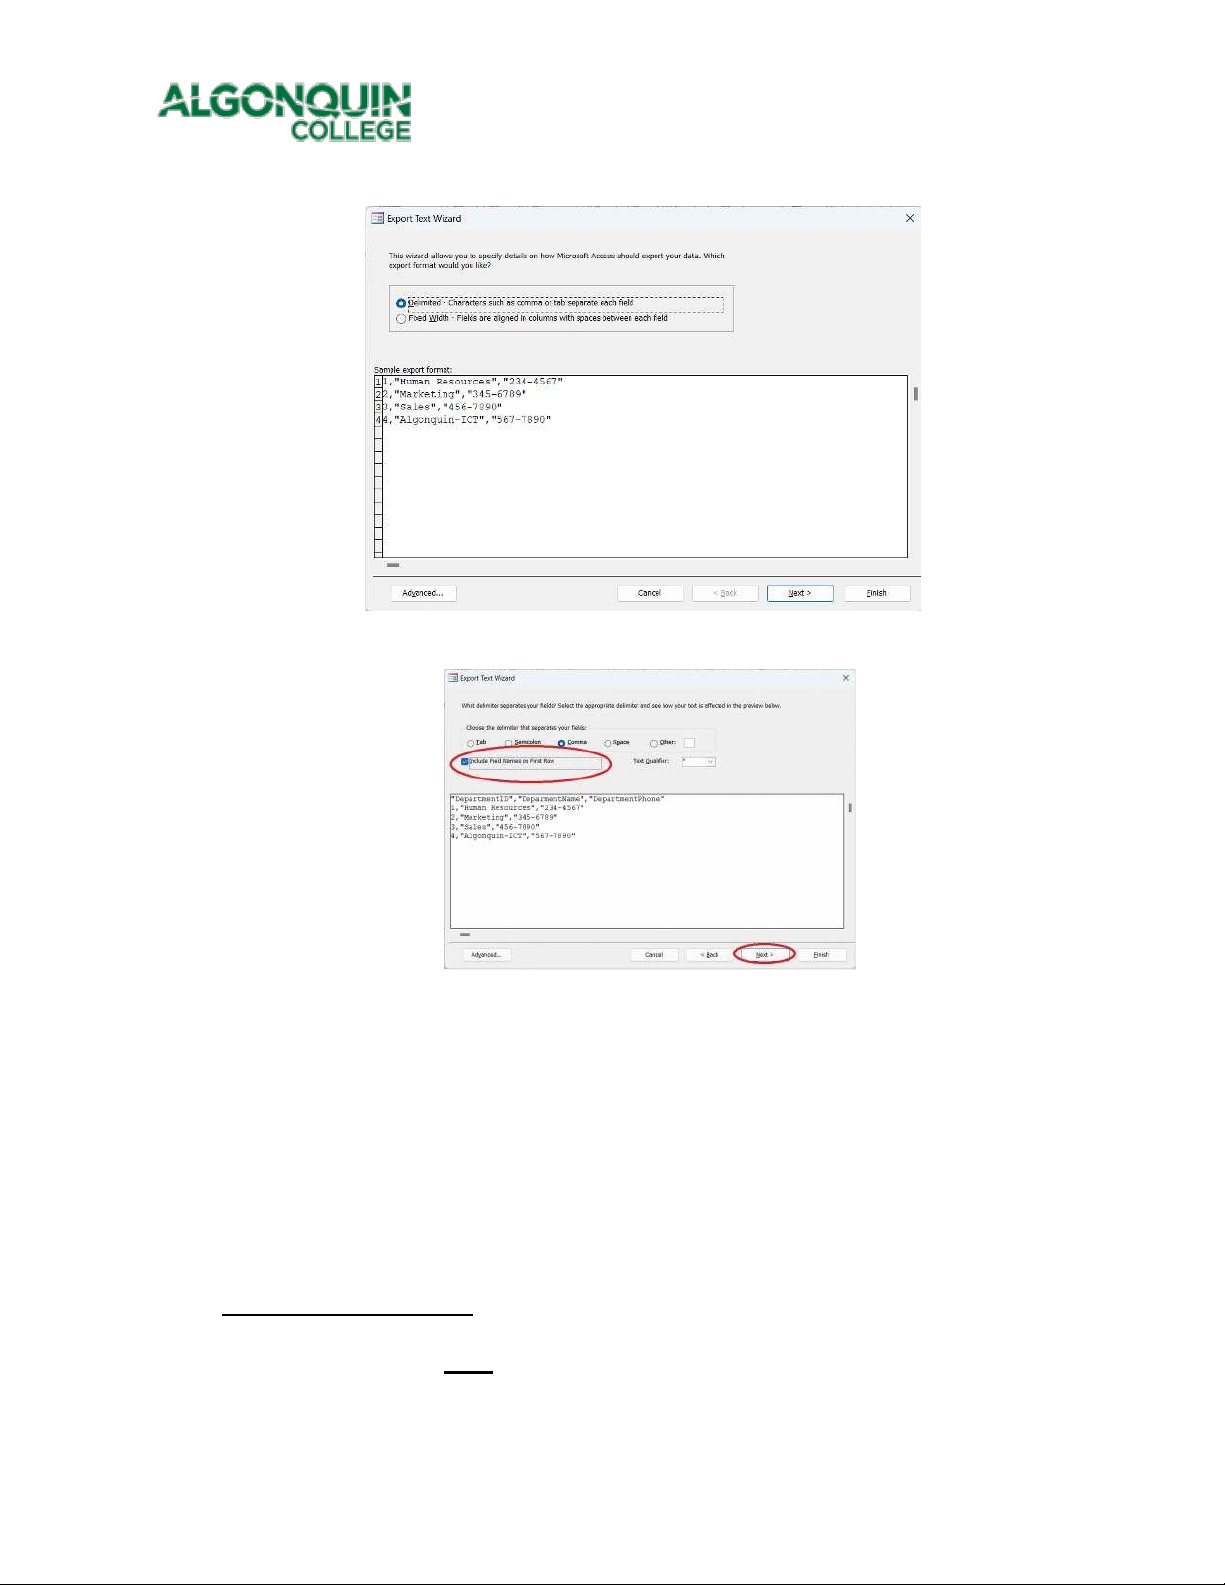
6.5. Select the ‘Delimited’ option and click Next. You will then get prompted as follows….
6.6. Make sure you DO select the “Include Field Names in First Row” option, and then Click Next.
6.7. Continue the exporting process for the “Departments” table, and repeat the process in a
similar fashion for the “Employees” table.
7. Continue by using SSMS (or re-open it if you have closed it and connect to your server).
7.1. Once launched, select “Databases” and create a new one (right-mouse click, etc.) named “lab2”.
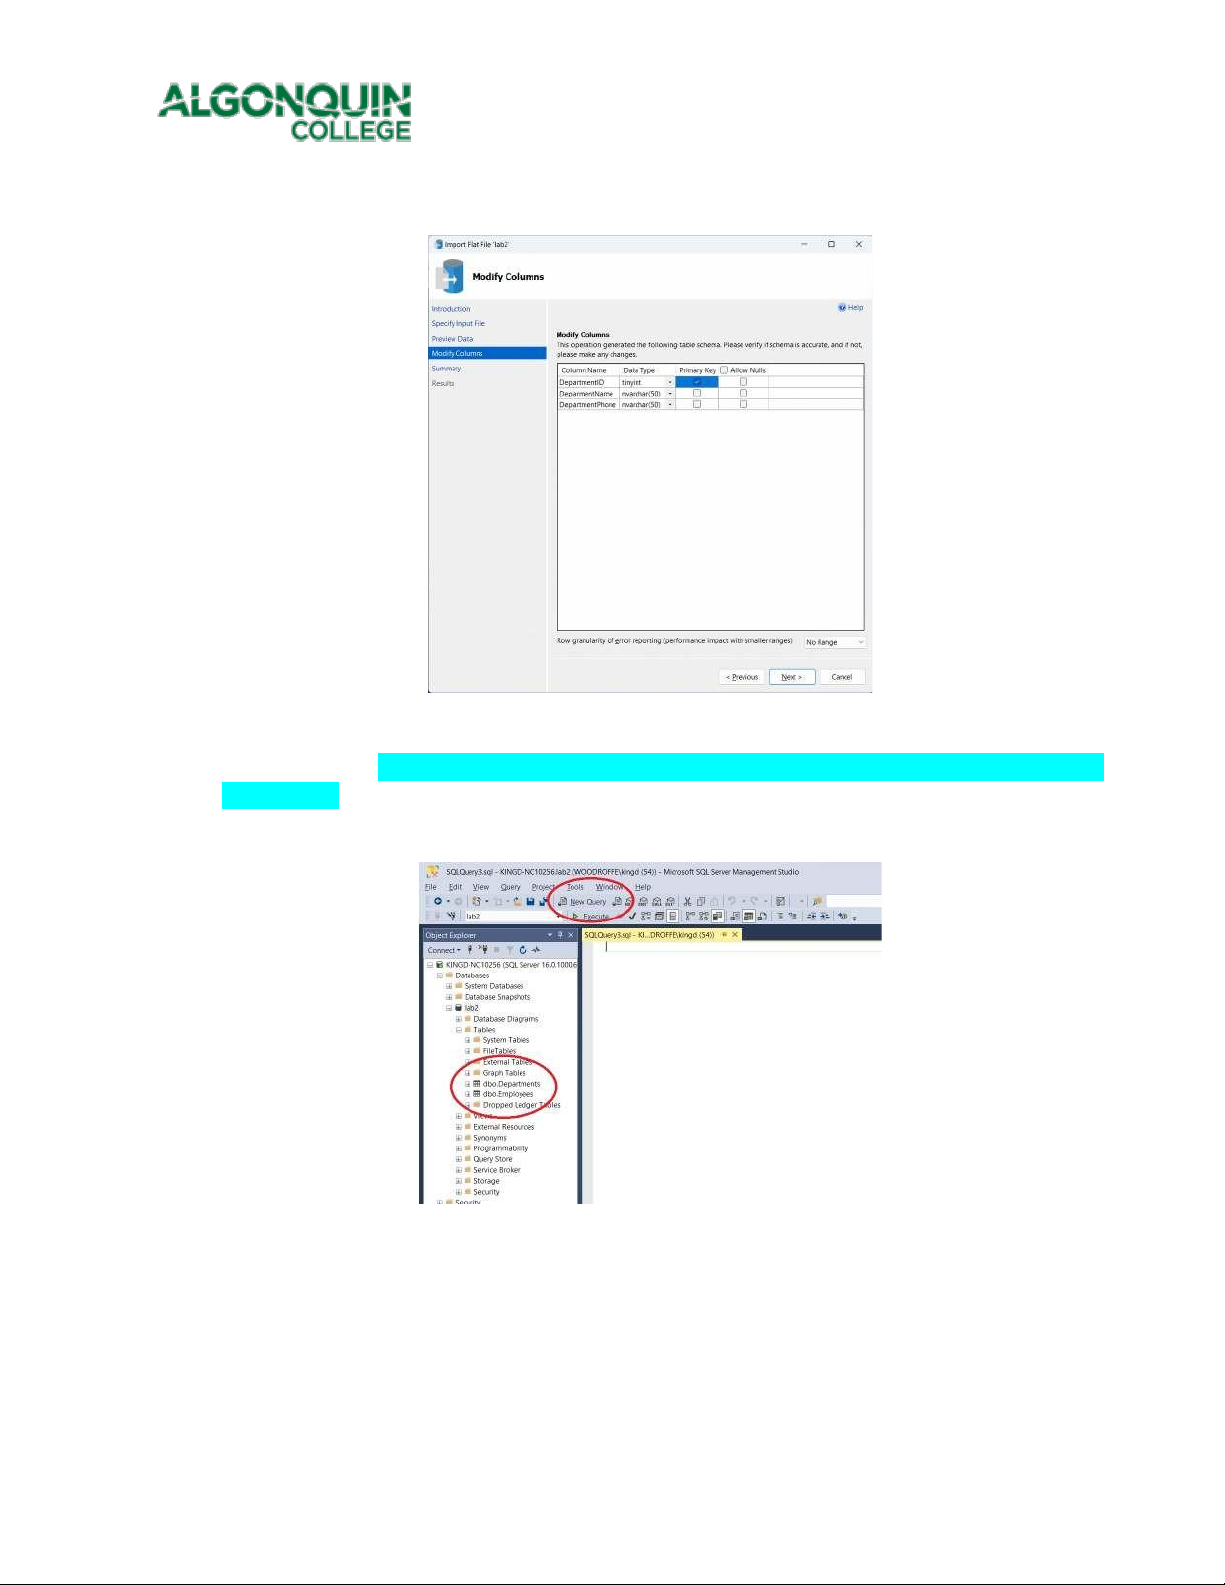
7.2. Select the lab2 database and then use the right-click menu to select the Tasks > Import Flat
File option. You want to import the “Departments” text file. The sequence is
straightforward (try it) BUT make sure you select the “DepartmentsID” field as the primary
key when prompted (see below). lOMoAR cPSD| 59078336 Algonquin College
of Applied Arts and Technology
7.2.1. When you get prompted for the Primary key
7.3. Once the Departments table is successfully imported, repeat the process in a similar fashion
for the “Employees” table. You should now be able to see your imported tables inside the
lab2 database. (Note: the lab professor may require you to use a different table and/or field – see step 2.)
7.4. Now you can use SSMS to build a New query to verify that the data was imported correctly:
7.5. and execute it to show all the data in the imported table. Here is my table: lOMoAR cPSD| 59078336 Algonquin College
of Applied Arts and Technology
Paste your screen shot here showing your table contents:
THIS IS THE POINT AT WHICH YOU NEED TO PROVIDE YOUR WORK BEFORE THE END
OF THE LAB SESSION TO RECEIVE PART MARKS.
Note: The remainder of the lab activities can be either submitted during the lab session, or submitted
later in Brightspace before the final deadline.
8. We want to allow remote applications (not just local SSMS) to connect using a
username/password without relying on Windows authentication. This will allow MS-Access and
other applications running on a client workstation to access the remote data. lOMoAR cPSD| 59078336 Algonquin College
of Applied Arts and Technology
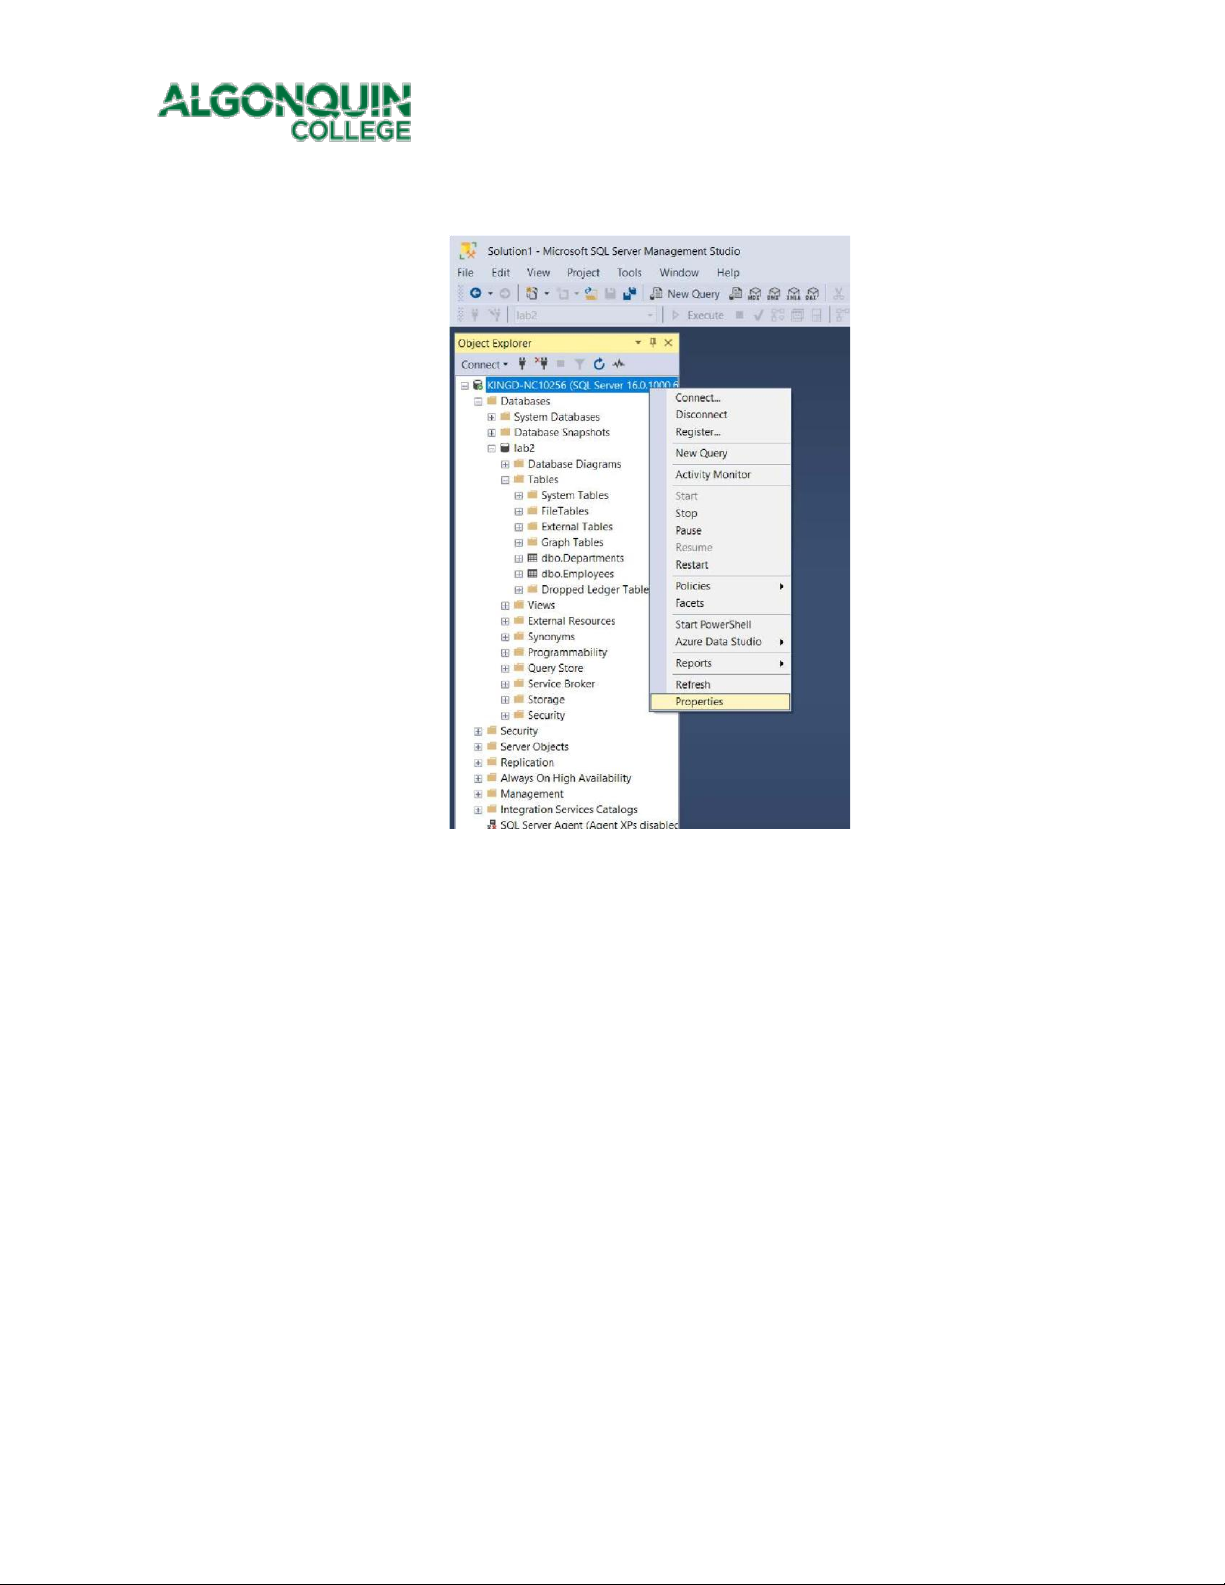
8.1. Select your server and open the properties window.
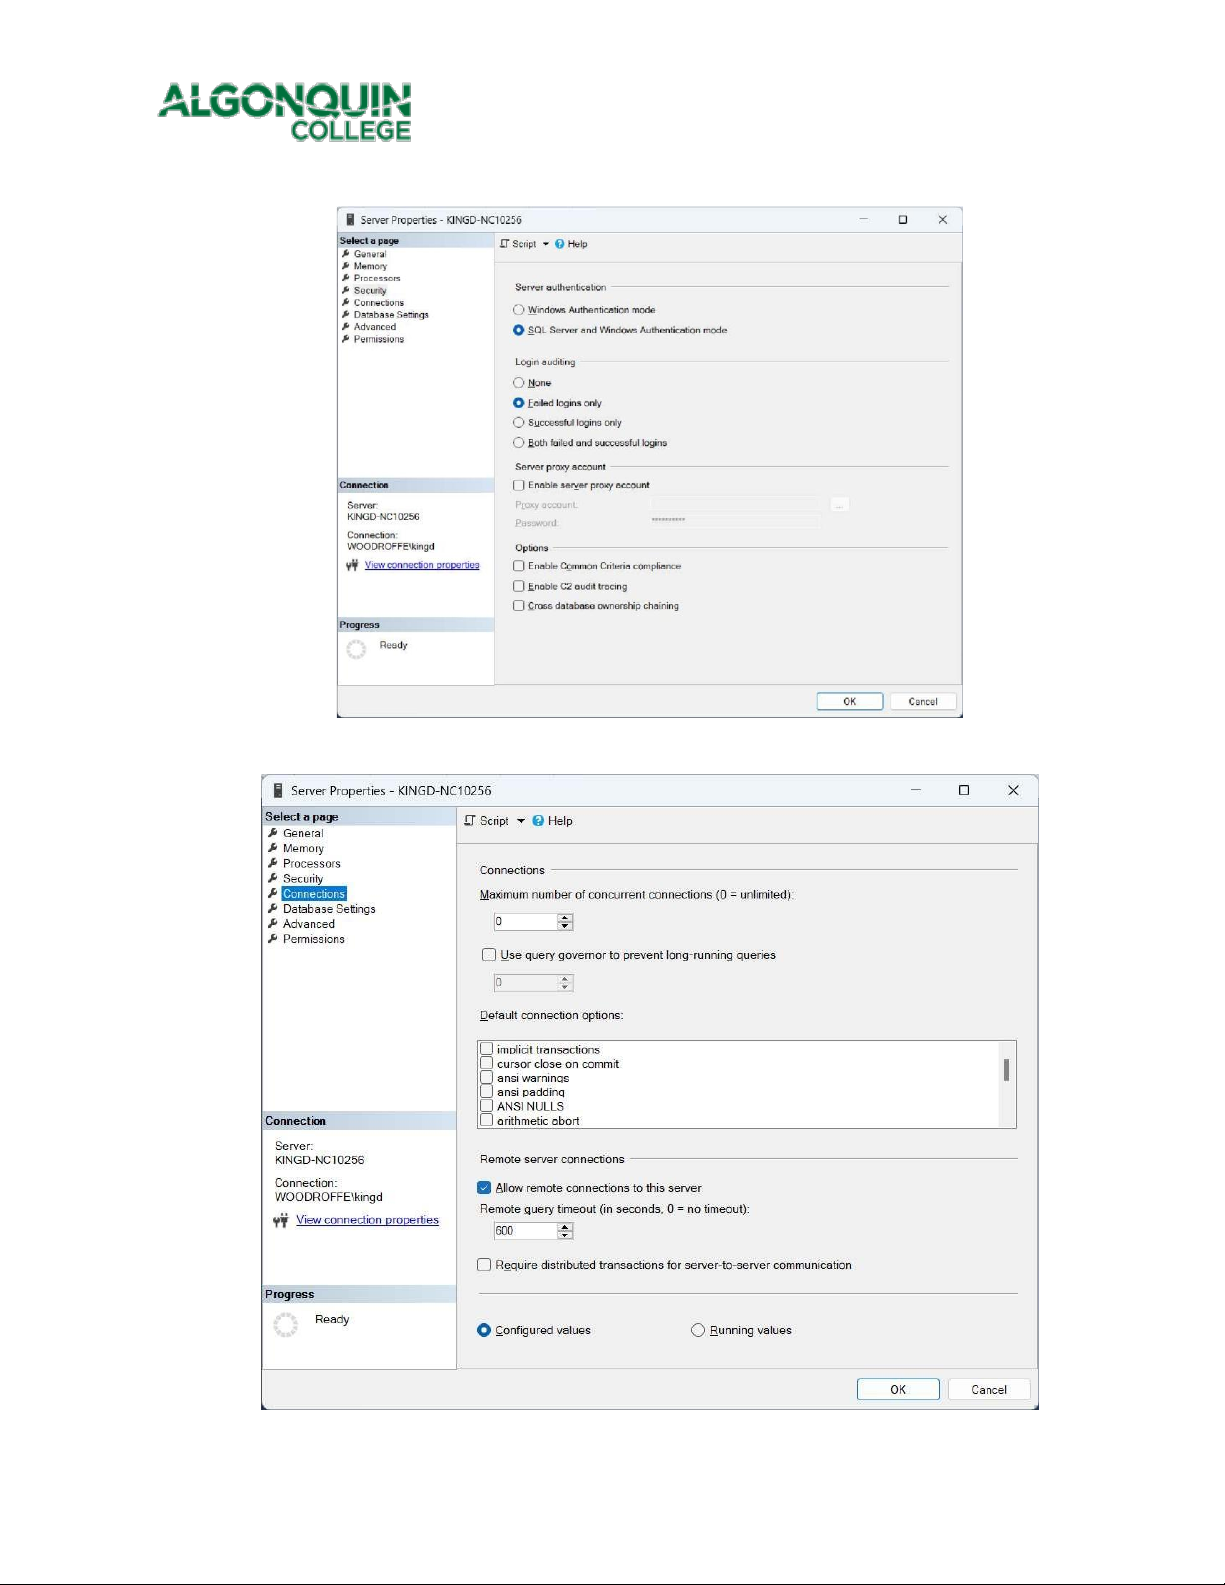
8.2. In the properties dialog, select the Security page and then the option for “SQL Server and
Windows Authentication Mode”. lOMoAR cPSD| 59078336 Algonquin College
of Applied Arts and Technology
8.3. On the Connections page, select the “Allow Remote Connections to this server” option. lOMoAR cPSD| 59078336 Algonquin College
of Applied Arts and Technology
8.4. After you have made these changes, you will need to restart the server.
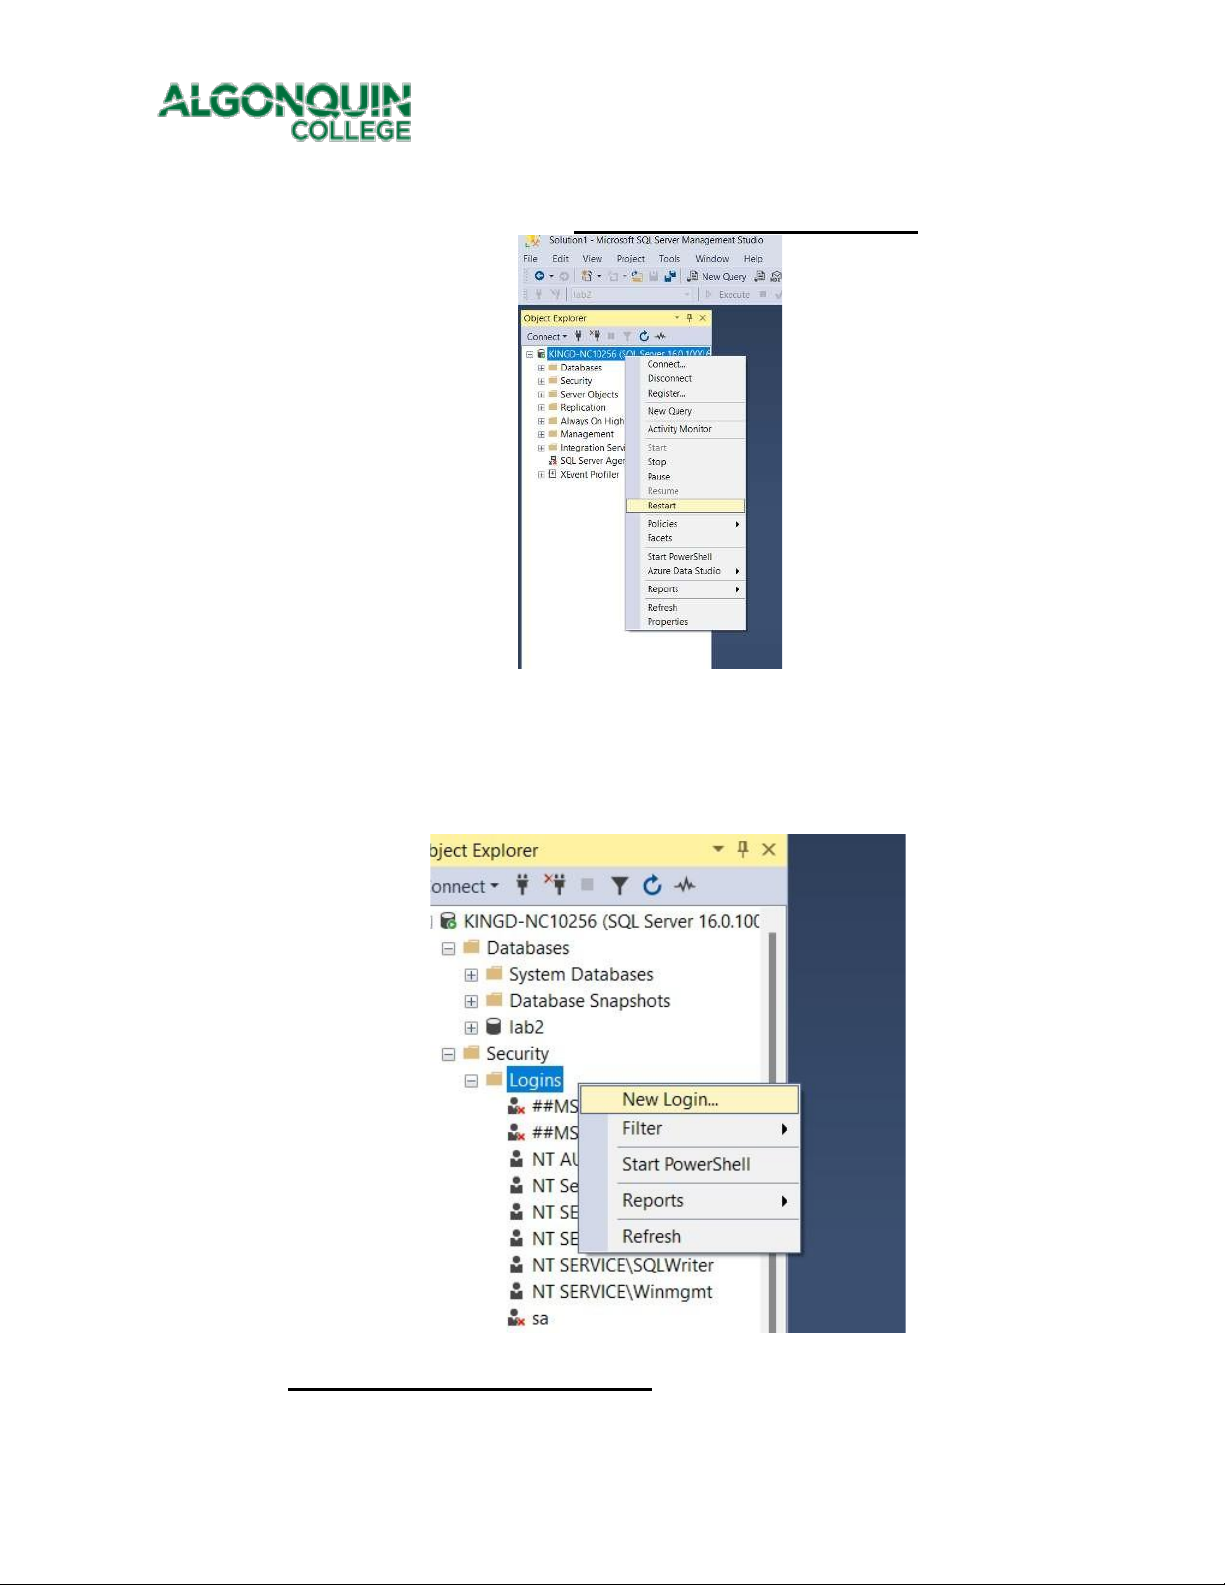
8.5. One last thing on the server side – we need to create a new user account for our applications
to use when they connect. Use yourlastnameUser (e.g., kingUser) with a simple password
(e.g., kingPassword123) and perform the following steps:
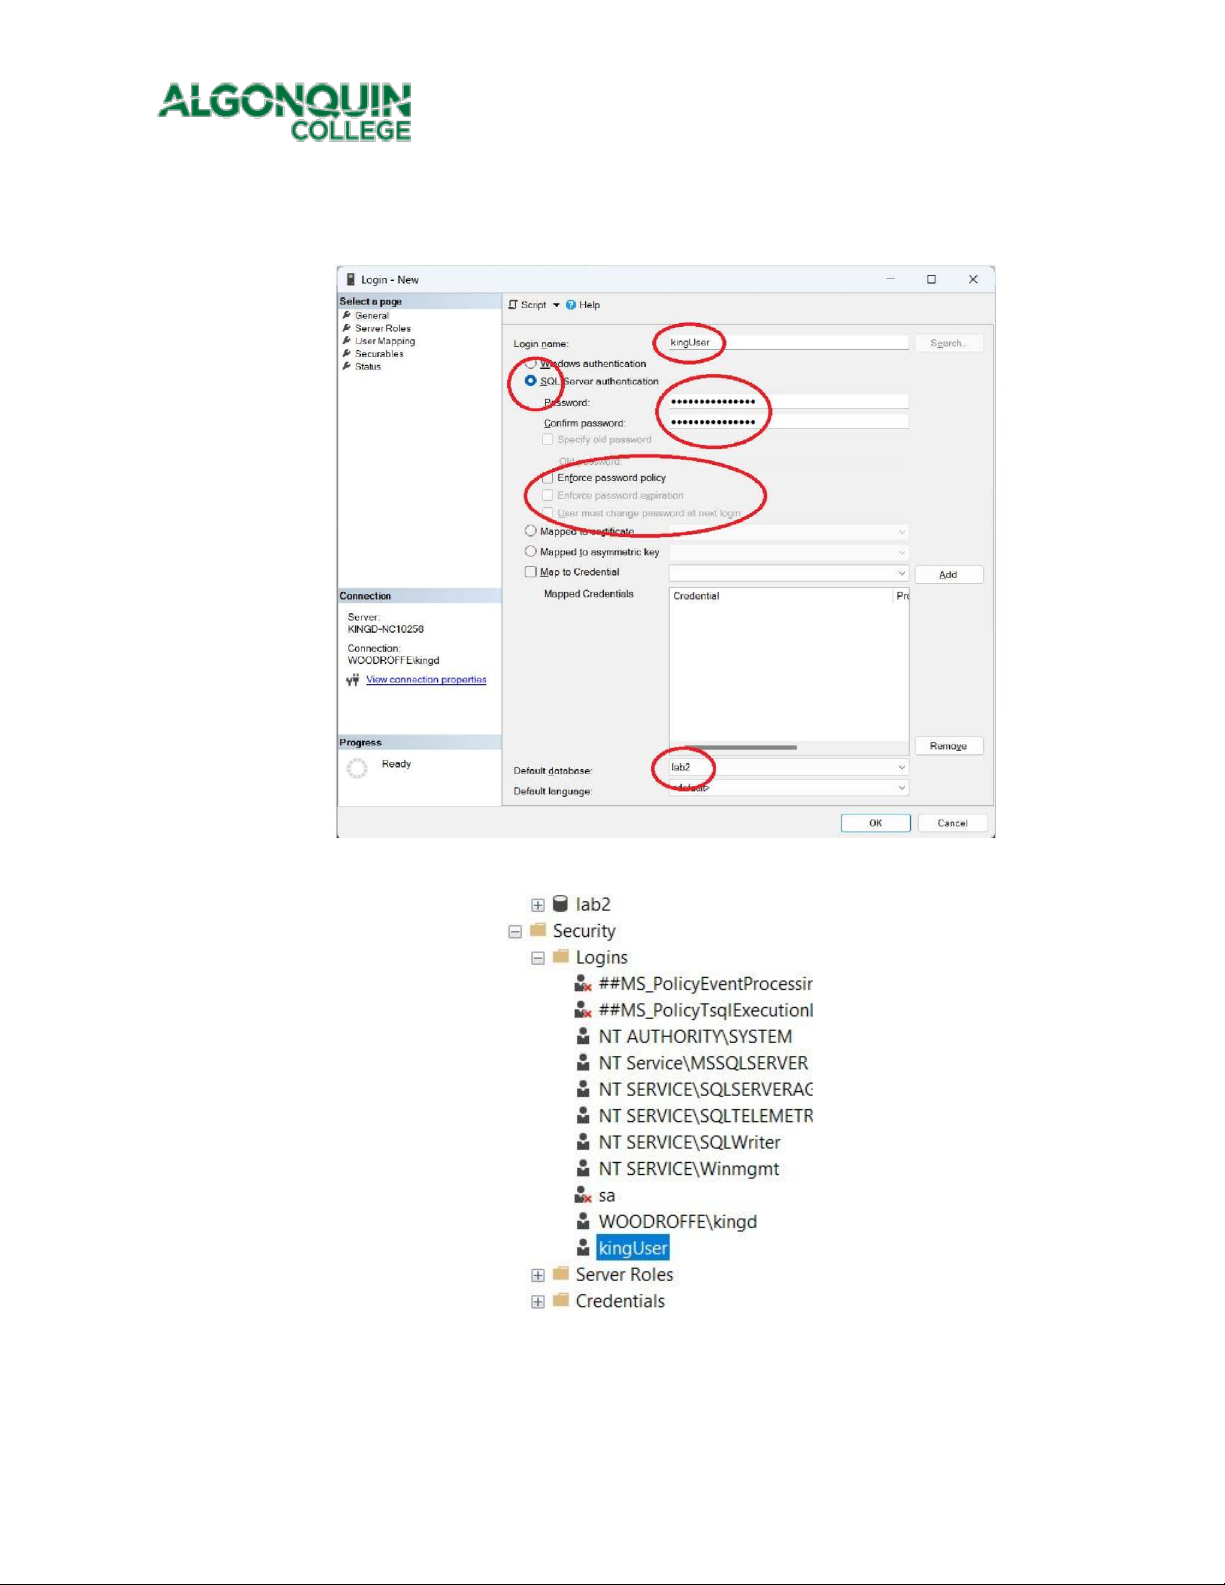
8.5.1. Open the dialog to create a new login
8.5.2. In the dialog for New login, select the General page and fill in the following fields.
This step needs to be done carefully – make sure you set the default database and lOMoAR cPSD| 59078336 Algonquin College
of Applied Arts and Technology
unselect the password expiry fields…. Otherwise you will not be able to connect easily from applications.
8.6. If successful, you will see your new login in the list…
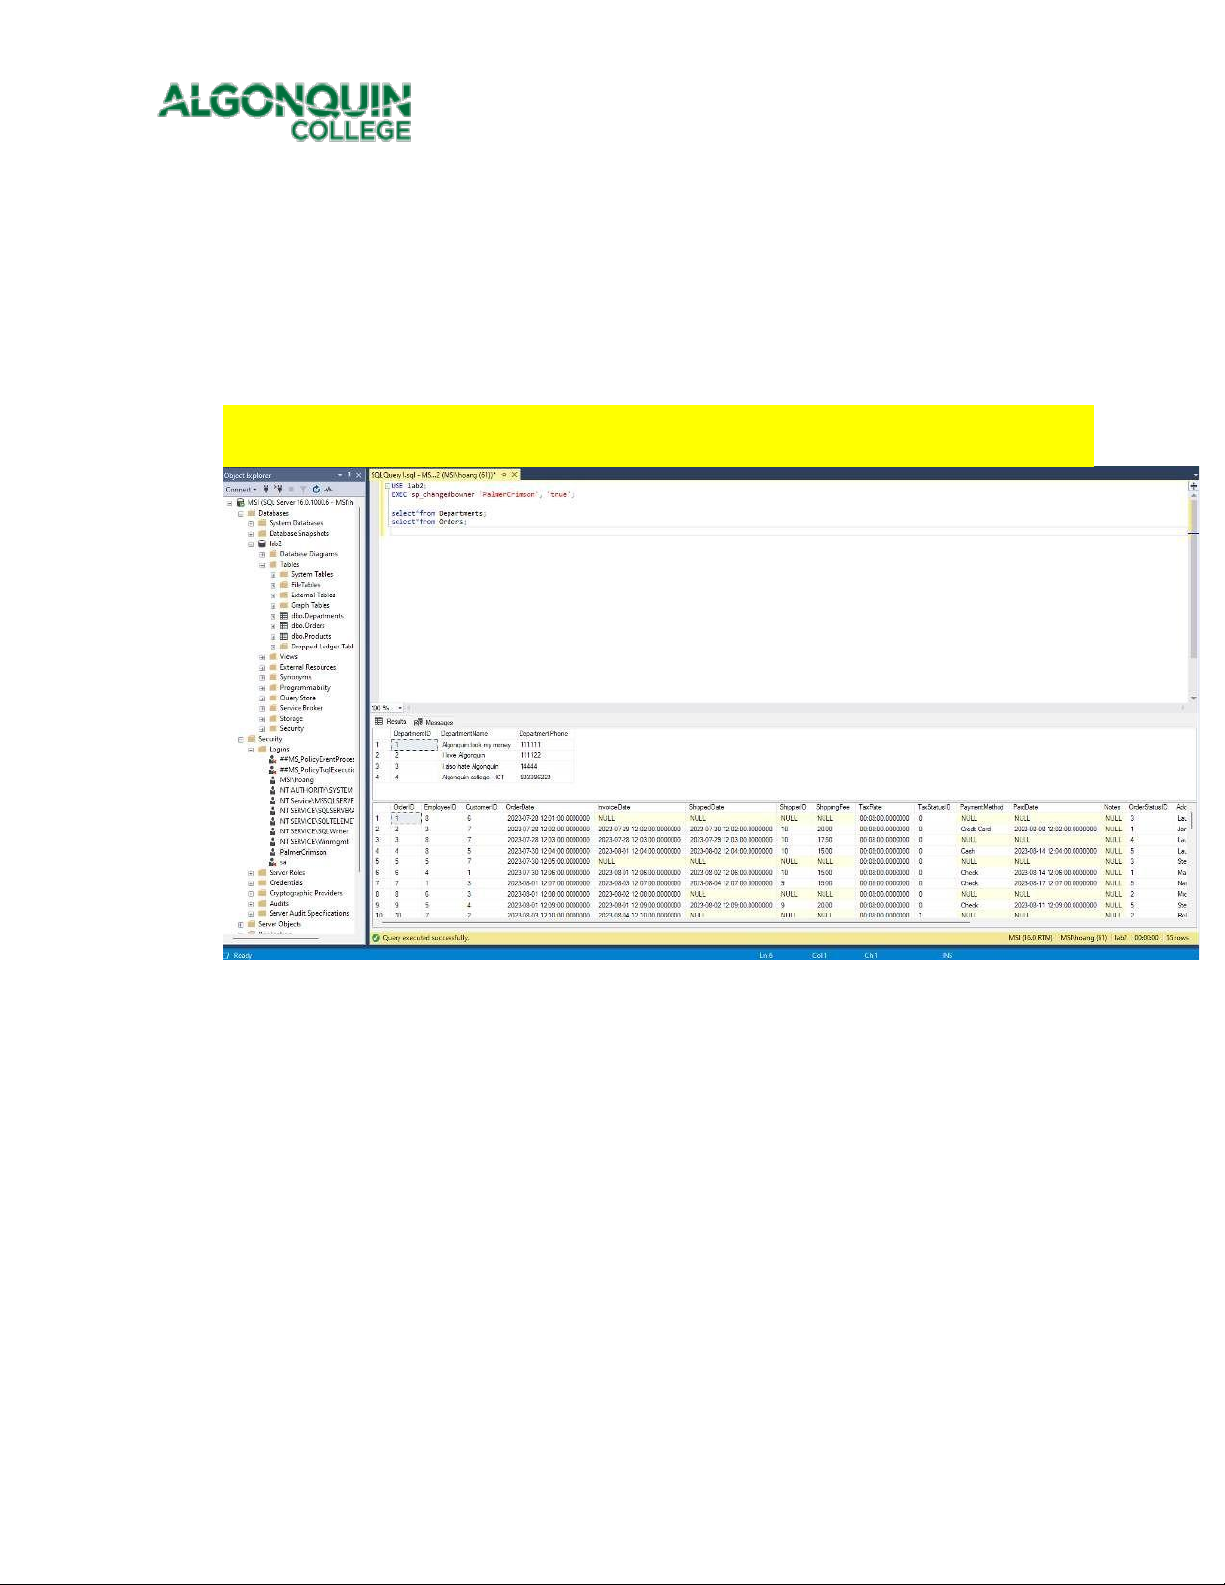
8.7. Now, while still connected as the Windows login user, (e.g., kingd) run the following sql
commands to change the ownership of the database lab2. (you will need to change the login
name to yourlastnameUser). lOMoAR cPSD| 59078336 Algonquin College
of Applied Arts and Technology USE lab2;
EXEC sp_changedbowner 'kingUser', 'true';
9. Now open a new connection to the (restarted) server and connect using your new login and
password. You should be able to see your data in the lab2 database.
9.1. Provide a screenshot for a query showing the content of each of the tables. Make sure the
screenshots clearly show your connection login, the queries being executed, and the results.
10. Once you have embedded all of your screenshots, I would encourage you to show the result to
your lab professor – if you are done in the lab session. Make sure you have included all of your
screen shots to document your work and submit the file in Brightspace and you’re done!
Tài liệu liên quan:
-

Develop a deepfake application to express emotions of image through voice control | Đồ án Môn Computer Science - Trường Đại học Quốc tế, Đại học Quốc gia Thành phố Hồ Chí Minh
90 45 -
Midterm Assignment | Môn Computer Science - Trường Đại học Quốc tế, Đại học Quốc gia Thành phố Hồ Chí Minh
107 54 -

Lab 7&8 - Creating Sequence Diagrams for Use Cases | Môn Computer Science - Trường Đại học Quốc tế, Đại học Quốc gia Thành phố Hồ Chí Minh
90 45 -
Lab 5&6 - Requirement Specification: Use Cases, ERD, and Class Diagrams | Môn Computer Science - Trường Đại học Quốc tế, Đại học Quốc gia Thành phố Hồ Chí Minh
106 53