Đề ôn tập Powerpoint - Tin ứng dụng | Trường Đại Học Duy Tân
1. Change the Page Setup to have a Custam size of 7.5 (19.05 cm) width x 10(25.4 cm) height and an orientation of the notes, handouts & outline to be Landscape. Ensure the content fits the new slide size.Design -> slide size -> custom size -> làm theo -> OK -> ensure fit
Môn: Tin ứng dụng (CS201) 106 tài liệu
Trường: Đại học Duy Tân 2 K tài liệu
Tác giả:


Preview text:
MOS (23-3-2) MS PPT Trainning 1:
1. Change the Page Setup to have a Custam size of 7.5 (19.05 cm) width
x 10(25.4 cm) height and an orientation of the notes, handouts & outline
to be Landscape. Ensure the content fits the new slide size.
Design -> slide size -> custom size -> làm theo -> OK -> ensure fit
2. Use the New Window to open the current presentation in a new
window, and use the Arrange All tool to see all the open presentations.
View -> new window -> arrange all 2 slide cạnh nhau
3. Save the entire presentation as a PDF; named Powerpoint01.pdf in the \
GMetrixTemplates folder. Make sure the Open File After Publishing option is unchecked.
File -> export to PDF -> publish
4. Save Slide 2 in the presentation as a JPEG image named Slide2.jps:
Chọn slide 2 -> save as -> chuyển file JPG -> only currently page
5. In Slide 2, apply the Fill - Orange, Accent 2, Outline - Accent 2 style to the word art Introduction.
Chọn chữ Intro slide 2 -> shape format -> quick style -> chọn thưo yêu
cầu (Fill - Orange, Accent 2, Outline - Accent 2)
6. On Slide 4 Reset the Picture and then Crop the picture to a Shape
named Round Diagonal Corner Rectangle
Chọn hình ở picture 4 -> reset -> crop to shape theo mẫu
7. Change the view to Slide Sorter and change the Zoom to 200%.
View -> slide shorter -> zoom in 200%
8. Set up a slide show for this presentation so that it can be browsed by an
individual, and will Loop continuously until the ESC key is hit. Accept all other default settings.
Slide show -> set up slide show -> làm như yêu cầu
9. Create a Custom Slide. Show with only the slide Practice Reading and
the slide Practice Reading Questions.
Slide show -> custom slide ->
10. Find all of the occurrences of the word Readig and correct them to Reading.
Home -> find -> reply
11. Start the slide show from the beginning. On Slide 5 use the
highlighter with Red ink and underline the first question. Save all annotations.
Slide show -> from begining -> see all slide, chọn slide 5 -> kick chuột
trái highlight màu đỏ (underlight) -> kick chuột phải End show , keep
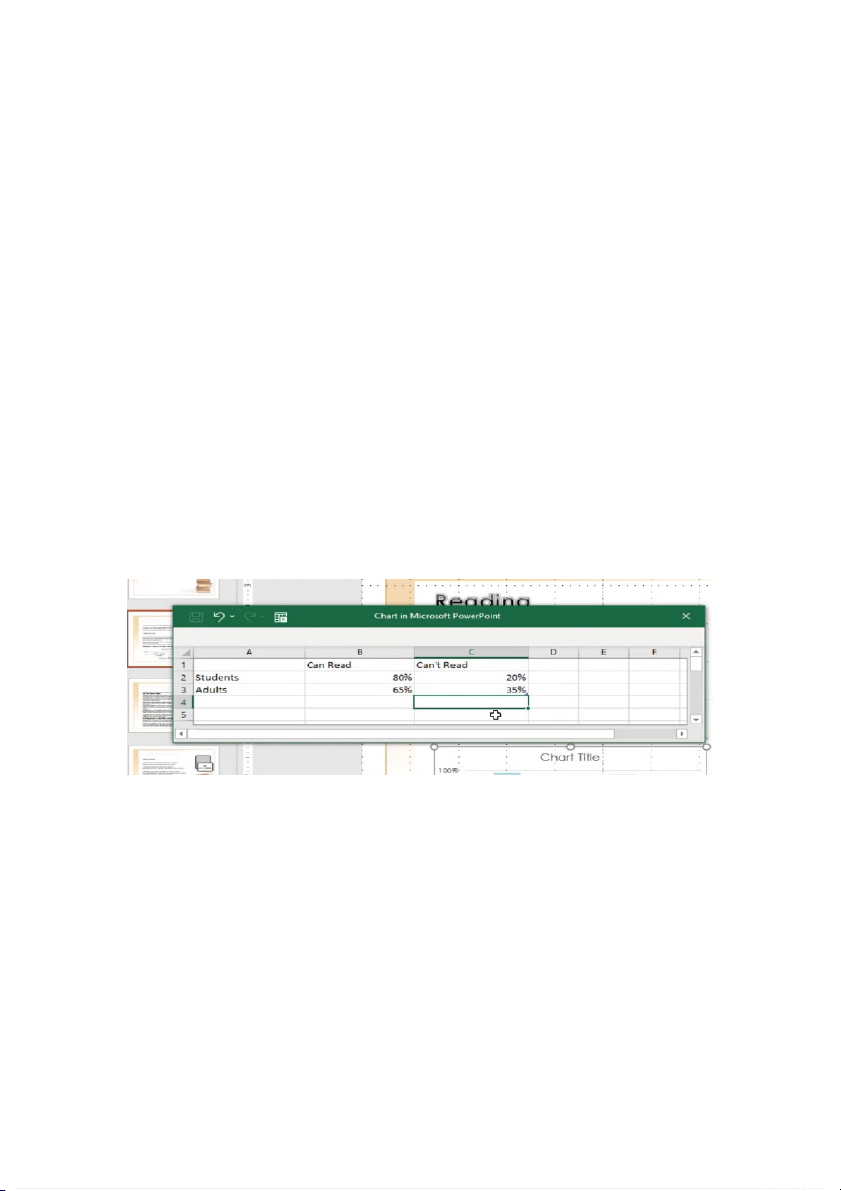
12. On Slide 2 insert a Clustered Column Chart inside the empty text box.
Resize the Chart Data Range to include only 2 categories and 2 series.
Slide 2 -> chọn biểu đồ -> Clustered Column -> xóa thành 3 hàng 3 cột
13. Convert the question list in Slide 5 to the Vertical Bullet List Smart Art.
Home -> bôi đen trong slide 5 -> chọn
14. Modify the Text Box on slide 3 with the Quote from Dr. Seuss by
adding the Shape Fill Gradient, Linear Down.
Shape format -> shape fill -> gradient -> Linear Down
15. Change the print settings of the document to Uncollated, and Grayscale.
File -> Print -> setting -> Uncollated and grayscale
16. On slide 4, apply the Table hierarchy layout, and the Subtle Effect style to the SmartArt.
Smart art design -> layouts Table hierarchy và chỉnh Subtle Effect
17. On slide 2, change the video shape to any shape that has a Rounded Rectangle type.
Video format -> video shapes -> Rounded Rectangle
18. Add a section above Slide 1 named Introduction and a section above Slide 3named SWOTs
Kick chuột tạo thanh ngang (add section) -> chọn chuột phải -> section -> rename
19. On Slide 1, add the Cash Register sound to the first animation.
Animation -> animation pane
chọn sound Cash Register
20. On Slide 2, select the words Fusion Tomo in the title and add a
comment that says Delete Fusion Tomo so that the title is SWOT Video.
Slide 2 bôi đen Fution Fomo -> insert -> comment
21. In the current presentation Delete the second Comment in the document.
Review -> chọn slide 1 -> next 2 lần -> xóa
22. On Slide 3 format the Competition Chart to show the Data Labels at Best Fit.
Chart design -> data label -> best fit
23. On Slide 3 format the chart Legend to be positioned at the Bottom
with a Solid Fill of Rose, Accent 2.
Chart design -> add chart element -> legend -> bottom -> format -> đổi màu rose
24. Apply the Zoom animation to the title of Slide 1.
25. On Slide 4, apply the Horizontal Figure 8 motion path to the image.
Animations -> cuối -> more motions path -> horizontal figure
26. Apply the transition on Slide 1 to all of the slides in the presentation.
Transition từ page 1 to all
27. Modify the transition on Slide 1 to Advance After 5 seconds, and not
on click. (on mouse click ) 28. In Slide 4,
with the bulleted list to have set the text box Two Columns.
29. Insert additional slides to the end of the current slideshow using the outline file Outline.docx.
Cuối slide -> insert -> new slide -> slides from outlines (outline.docx)
30. Create a handout of the presentation with blank lines below the slides.
Save the word document that opens as MyHandout.docx in your \
GMetrixTemplates folder. Close the Word document after saving.
File -> export -> create handouts -> blank lines.... -> file word -> save
as -> file GM -> MyHandout.docx
31. On Slide 5 insert a new row on top of the first table, and merge the
cells. Type the words Customer Orientation in the merged cell.
Insert above -> Merger cells -> nhập cụm từ Customer Orientation
32. On Slide 3 change the Chart Type to Clustered Bar.
Chart design -> Change Chart type -> Clustered Bar
33. On Slide 5, change the animation of the text box The Marketing Way
to start After Previous with a 5.00 second delay.
Animation pane -> marketing -> after
34. On Slide 3 apply the Shape Style Colored Outline - Orange, Accent 1 to the Chart.
Chọn biểu đồ -> forrmat -> shapes style -> orange
35. On slide 5, reorder the animations so that the label at the bottom is
first, the top table is second, and the bottom table is third.
Chỉnh thứ tự chạy animations
36. Create a New Photo Album and insert the pictures photo1.jpg,
photo2.jpg, and photo3.jpg. These images can be found in your GMetrix
Templates folder. Order the pictures by photo2.jpg first, photo3.jpg second, and photo1.jpg third.
New -> xóa slide -> photo album -> photo 123 in GM folder -> sửa theo thứ tự ảnh
37. Select Slide 3. Change the view of the presentation to Notes Page.
Below Slide 3 add the note: Take reading with you through technology.
Slide 3 -> view -> notes page -> take note
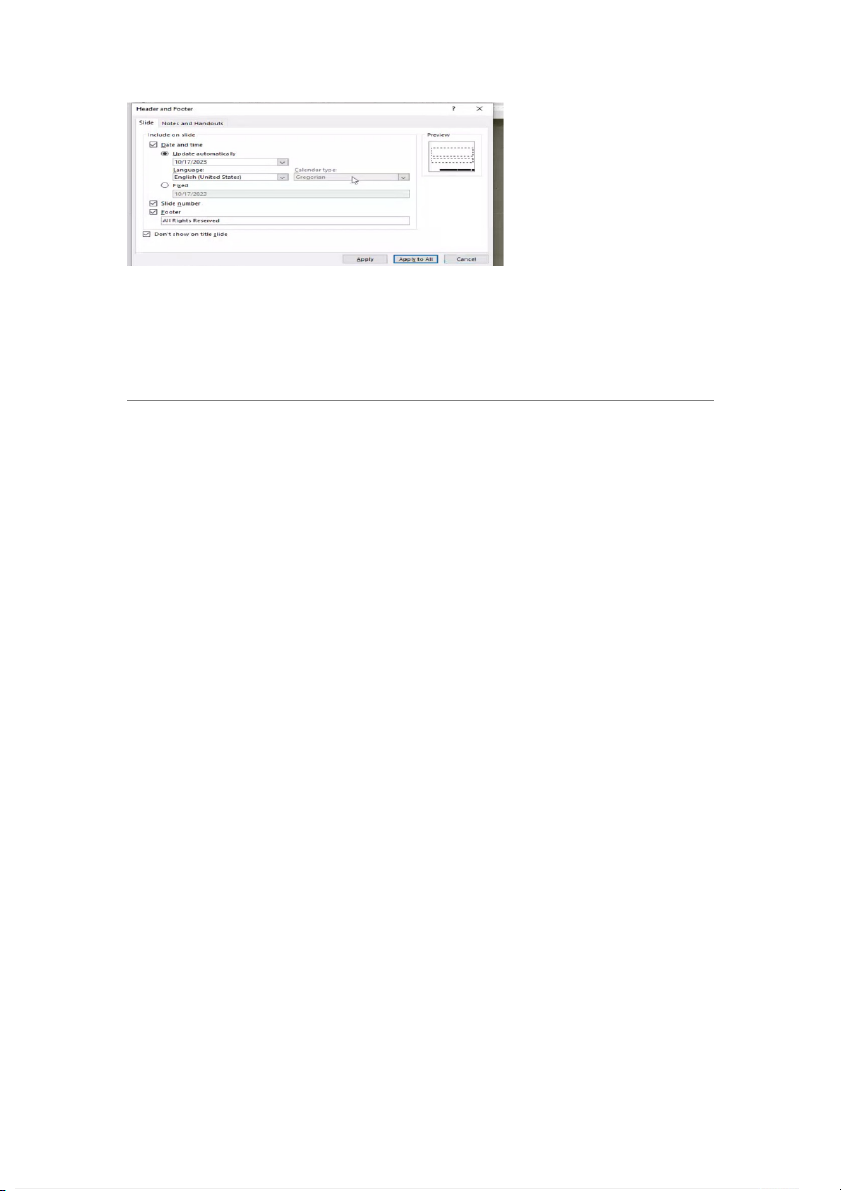
38. Apply a footer to all of the slides in the presentation except the title
slide. The footer should include the date and time set to update
automatically, the slide number, and a footer that reads: All Rights
Reserved. Accept all other defaults.
Insert -> text -> headder and footer
39. Change the view of the slideshow to Grayscale, and show Gridlines.
View -> grey sclae -> view -> tắt Gridlines.
40. In the document properties, add the title Staff Training.
File -> infor -> title -> add Staff Training Trainning 2:
1. Start Recording from Beginning of the current Slideshow. Click
through to the end of the slideshow.
Slide show -> record slide show -> record from beginning
2. Change the current Presentation Theme to Retrospect. Design -> Retro
3. Set the Orientation of the current presentation to be Portrait with Ensure Fit selected.
Design -> slide share -> custom
4. Change the PowerPoint AutoCorrect Options to not show the Auto Correct Options buttons.
File -> option -> proofing -> auto
5. On Slide 3 format the picture by changing the Brightness to -40% and Contrast to +20%.
Picture format -> corrections
6. On Slide 3, center the title text in the textbox that says INCOME, and
apply the Transform Deflate text effect. Change the text of the word art to read OUR INCOME.
Shape format -> text effect -> transform -> deflate -> change text out income
7. mark the presentation as final
File -> info -> protect present -> mark as a final
8. On Slide 1, format the text in the text box containing the title Training
Day to be Center aligned and with Italic text.
9. Delete slides 4 to 8 at the same time
10. Delete the Annotation on Slide 2 under the heading Estimated Expenses.
11. On slide 4, Convert the Smart Art graphic under the title Viral Marketing into Text.
Smart art -> convert to text
12. On slide 4, change the video Playback options to Start On Click, and Rewind after Playing.
13. Change the 1st animation on slide 2 to have a 0.5 second duration.
14. On Slide 3 format the image to have a Picture Effect Shadow of Inner with Inside Left effect.
15. Set your Timings to Advance Each Slide After 2 seconds.
Choose slide 1,2 ctrl A -> transition after 2s
16. On Slide 1 format the image to have a hyperlink of www.fusiontomo.com
Insert hyper link to wwebsite ..
17. On Slide 5 format the chart to have a shape style of Moderate Effect
- Purple, Accent 6 with a weight (shape outline) of 6 pt.
18. In Slide 2, add Star Bullets to each point in the main textbox.
19. Clear the timing on All the Slides.
20. Select Slide 3 and Start Recording from Current Slide. Record to the
end of the presentation. (same)
21. On Slide 5 change the Table Style of the to Themed Style 2 top table - Accent 6.
Table Design -> table style -> chọn bảng thay đổi
22. On Slide 4, format the chart gridlines on the Primary Horizontal axis
to show Major & Minor Gridlines.
Table -> chart design -> Add chart element ->
27. On slide 2 change the chart layout to layout 4
Chart design -> quick layout ->so4
28. Change the theme colors of the presentation to Grayscale and set the zoom level to 60%.
Design -> theme color (variants) -> view zoom 60%
29. Modify the current photo album so that the pictures are displayed in
black and white. Reorder the pictures To that the first picture is last, and
apply the Facet theme to the slideshow.
Insert -> photo album (edit photo album) -> black and white -> the first
picture is last -> browse: Facet
30. Delete all the slides except for the title slide in the presentation
31. On slide 2, modify the body textbox to have 3 columns, and apply the
Colored Outline - Yellow, Accent 3 style.
32. On slide 4, modify the chart type to be a 3-D Pie
33. Apply a swivel entrance animation to the MARKETING BUDGET PLAN textbox.
34. On slide 3, change the second animation to Grow & Turn, and the
duration of the second animation to 3.00 seconds.
35. Delete the comment in slide 1. to the heading of Add a comment
slide 9 that reads Cite your sources.
36. Insert a footer that shows the slide number, and the text FusionTomo
into every slide except the title slide.
Insert -> text -> tick slide number; tick footer: text, tick don’t show….
37. Encrypt the document with the password GMetrix: Mark the
document as final. File -> info -. Password -> mark as final
38. Create a slideshow to only show slides 2. 3, and 4. Set up the show to be browsed by an individual.
Slide show -> set up slide show -> tick individual (window) -> from 2-4
39. On slide 5, add a row above the top row of the table. Merge the cells,
and enter the text Yearly Spending
40. Remove all animations from slides 2
41. Change the theme of the slideshow to Slice, and change the slide orientation to Portrait.
Design -> themes slice -> slide size: orientation to Portrait
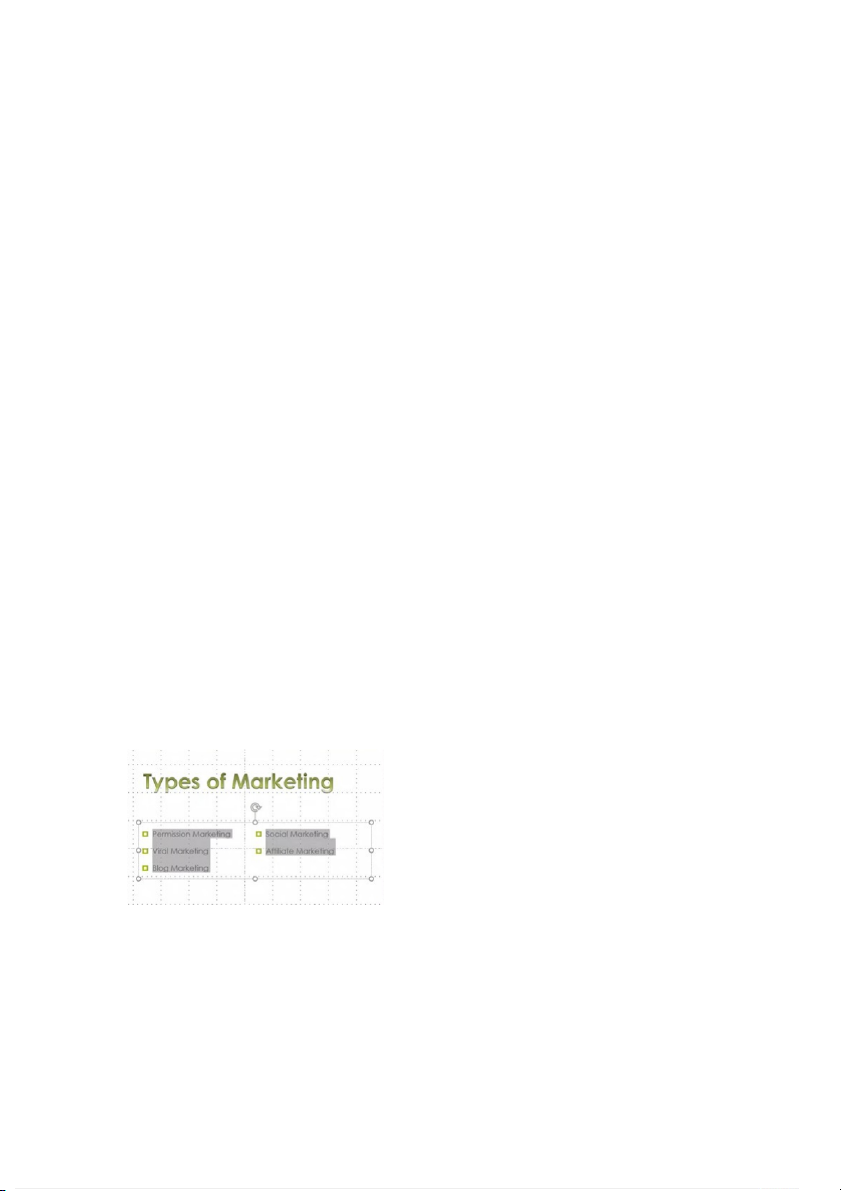
42. Convert the bulleted list on slide 2 to a Vertical Block List SmartArt. s
Tài liệu liên quan:
-

tài liệu ôn tập môn seo (2024-2025)
34 17 -

KidsLand Project Plan V1 - Development Overview and Team Structure | Đại Học Duy Tân
199 100 -
CMU-IS 401 Final Exam No. 1 - Information System Applications | Đại Học Duy Tân
241 121 -
Ôn tập Hy Lạp cổ đại - Lịch sử văn minh thế giới 1 | Trường Đại Học Duy Tân
384 192 -
Thi trắc nghiệm kết thúc học phần - Tin ứng dụng | Trường Đại Học Duy Tân
1.9 K 1 K