LAB 03: Authentication | Báo cáo thực hành môn An toàn thông tin Trường đại học sư phạm kỹ thuật TP. Hồ Chí Minh
Min/Max Values for Automatic UID Selection: + UID_MIN UID_MAX và chọn. User ID (UID) là giới hạn tối thiểu và tối đa cho việc tự động khi bạn tạo một tài khoản mới bằng lệnh useradd. Trong trường hợp này, tài khoản mới sẽ được gán một UID trong khoảng từ 1000 đến 60000. Điều này có nghĩa là nếu bạn tạo một tài khoản mới mà không cung cấp UID cụ thể, hệ thống sẽ tự chọn UID trong khoảng này để gán cho tài khoản. Tài liệu giúp bạn tham khảo, ôn tập và đạt kết quả cao. Mời bạn đọc đón xem!
Môn: An toàn thông tin (INSE330380) 147 tài liệu
Trường: Trường Đại học Sư phạm Kỹ thuật Thành phố Hồ Chí Minh 4.3 K tài liệu
Tác giả:

Preview text:
BỘ GIÁO DỤC VÀ ĐÀO TẠO
TRƯỜNG ĐẠI HỌC SƯ PHẠM KỸ THUẬT
TP.HCM KHOA CÔNG NGHỆ THÔNG TIN
BỘ MÔN AN TOÀN THÔNG TIN 🙚🙤🙦 🙘
BÁO CÁO BÀI THỰC HÀNH LAB 03: Authentication
MÃ MÔN HỌC: INSE330380_23_2_03
THỰC HIỆN: Lê Quang Trọng Nghĩa MSSV: 22162029
GI=NG VIÊN HƯỚNG DẪN: TS. HuAnh Nguyên ChCnh
Tp. Hồ ChC Minh, tháng 03 năm 2024 1. Password policies a) Linux:Ubuntu
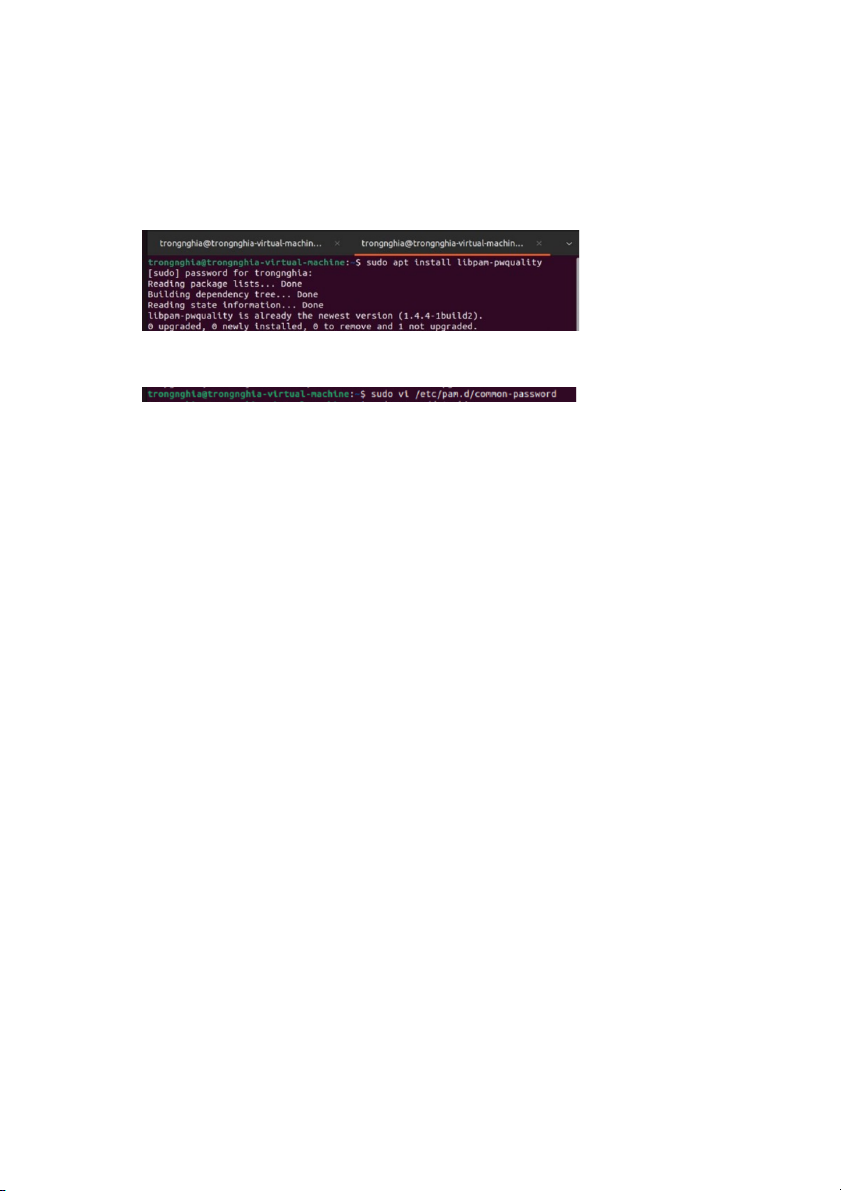
Step 1. Install package: PAM (lib-pamquality)
$sudoaptinstalllibpam-pwquality
Step 2. Edit the configuration:
$sudovi/etc/pam.d/common-password Options: o
Retry = 4 : Sốlầnliêntiếpngườidùngcóthểnhậpsaimậtkhẩu o
Minlen = 9 : độdàingắnnhấtcủamậtkhẩu o
Difok = 4 : Sốkýtựcóthểgiốngvớimậtkhẩu cũ o
Lcredit = -2: Sốchữthườngtốithiểulà2 o
Ucredit = -2: Sốchữhoatốithiểulà2 o
Dcredit = -1: Sốchữsốtốithiểulà1 o
Ocredit = -1: Kýtựđặcbiệttốithiểulà1 o
Reject_username: Từchốimậtkhẩuchứatênngườidùng o
Enforce_for_root: Cũngthựcthichínhsáchchongườidùngroot.
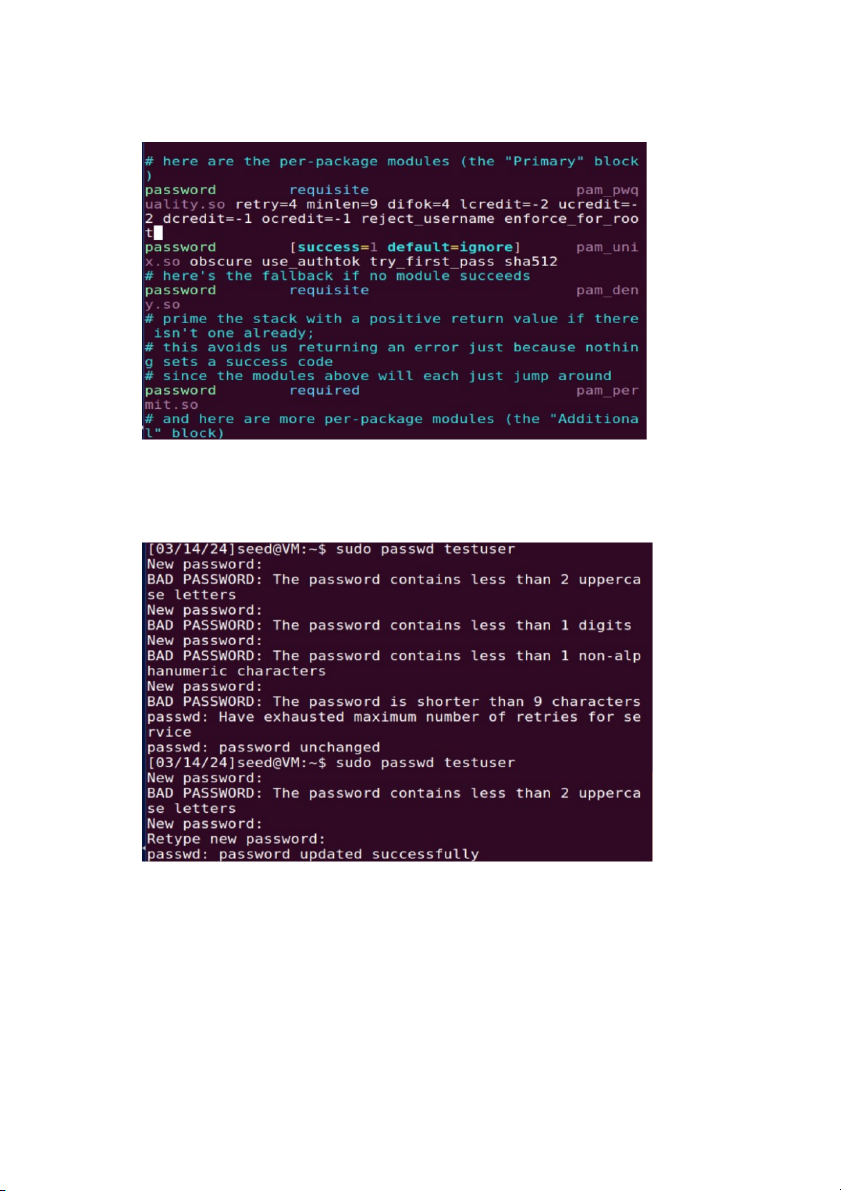
- ĐểchỉnhsửacầnphảivôINSERT bằngcúphápShift + A, sauđóđổicúpháp thành:
password requisite pam_pwquality.so retry=4 minlen=9 difok=4 lcredit=-
2 ucredit=-2 dcredit=-1 ocredit=-1 reject_username enforce_for_root
Đểthoátragõ‘ ’ :qw!
Verify the configuration (Xác thực cấu hình) :
Tạotàikhoảnbằng2câulệnh:$sudouseraddtestuser
$sudopasswdtestuser
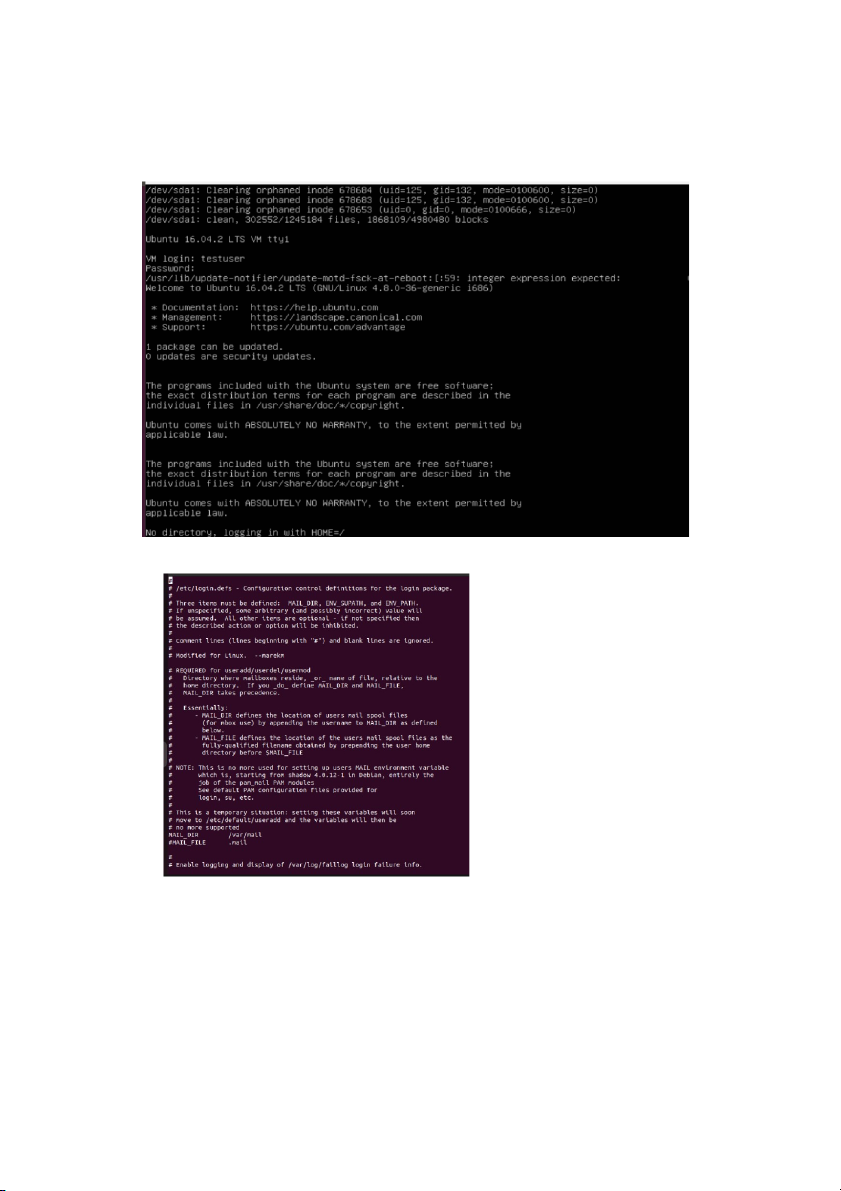
Đăngnhậpvàouser:testuser(chuyểnmànhình:Ctrl+Alt+F1,quayvề:Ctrl +Alt+F7.
Step 3. Edit the configuration:
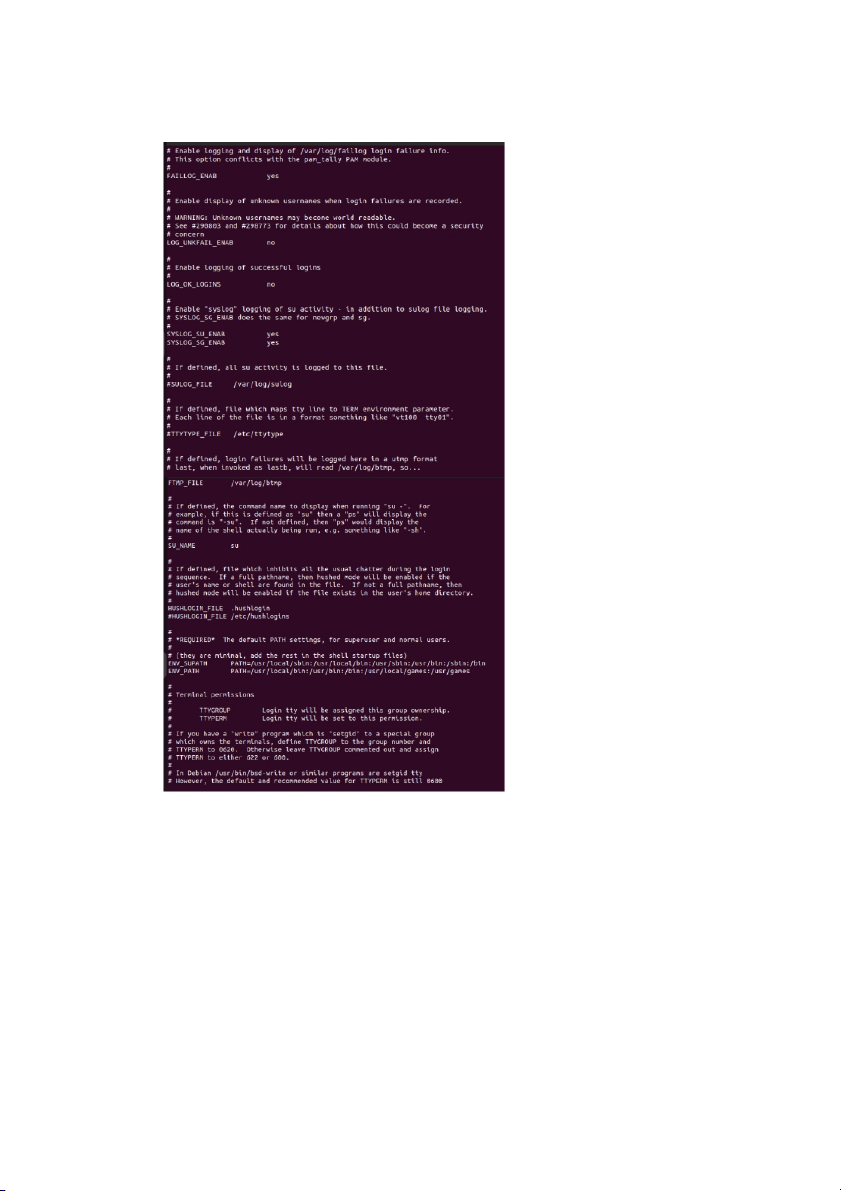
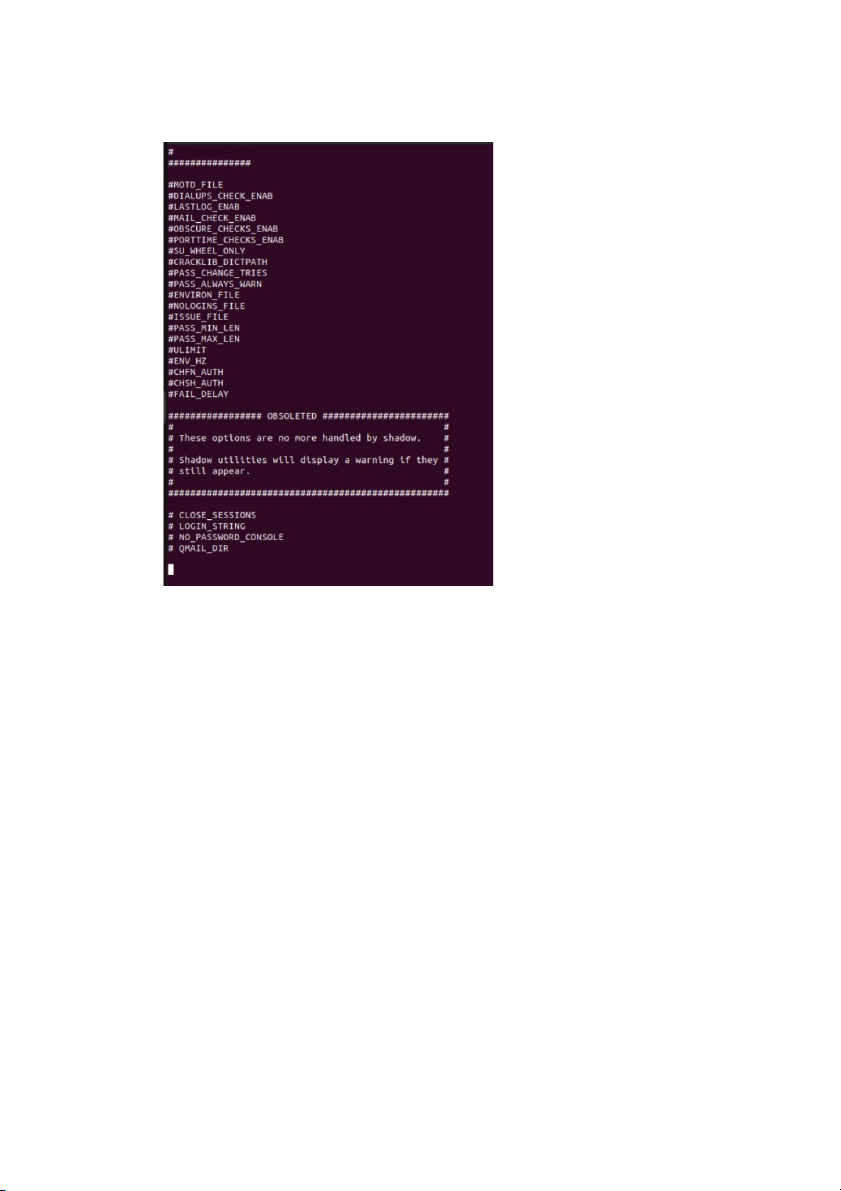
$sudovi/etc/login.defs
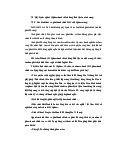
- Cấuhìnhnàyđểđiềuchỉnhcácquytắcliênquanđếntuổithọmậtkhẩu(password
agingcontrols)vàcấuhìnhcácgiớihạnchoviệctựđộngchọnUID(UserID)khitạo
mớitàikhoảnbằnglệnhuseradd.Dướiđâylàgiảithíchtừngphần:
Min/Max Values for Automatic UID Selection: +
UID_MIN và UID_MAX làgiớihạntốithiểuvàtốiđachoviệctựđộng
chọnUser ID (UID) khibạntạomộttàikhoảnmớibằnglệnhuseradd. +
Trongtrườnghợpnày,tàikhoảnmớisẽđượcgánmộtUIDtrongkhoảngtừ
1000đến60000.Điềunàycónghĩalànếubạntạomộttàikhoảnmớimàkhôngcungcấp
UIDcụthể,hệthốngsẽtựchọnUIDtrongkhoảngnàyđểgánchotàikhoản. +
ViệcgiớihạngiữaUID_MIN vàUID_MAX giúpquảnlý tránhxung UID
độtvàhỗtrợquảnlýtàikhoảnngườidùngtrênhệthống
LOGIN_RETRIES: Sốlầnthửpassword
LOGIN_TIMEOUT:Thờigiantốiđađểđăngnhập b) MS Windows
- Tạomộttàikhoảnvàkiểmtramộtsốchứcnăng:
+ Độdàimậtkhẩutốithiểu + Mậtkhẩumạnh
+ Ngưỡngkhóatàikhoản
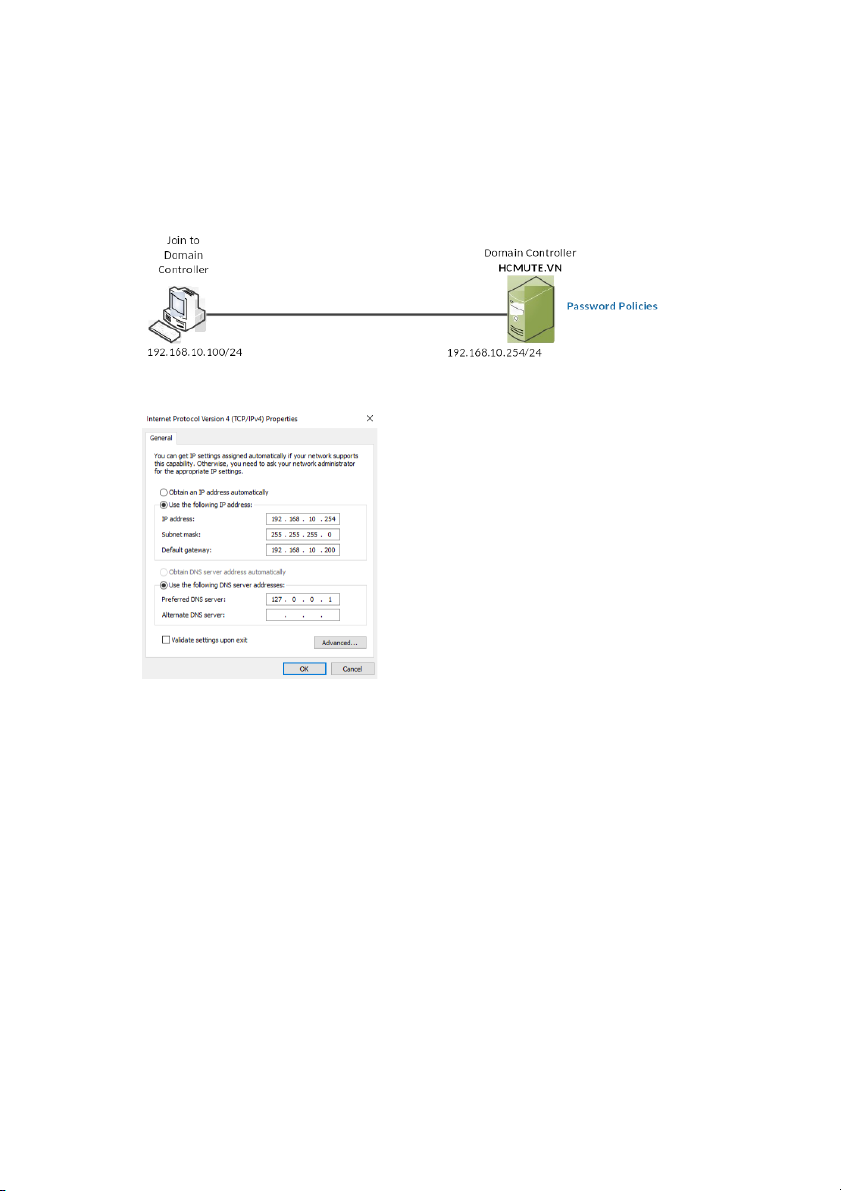
Bước 1: Thiếtlậpcấutrúcliênkếtmạng(Set up the network topology)
Cấu hình IP cho Window Server 2022
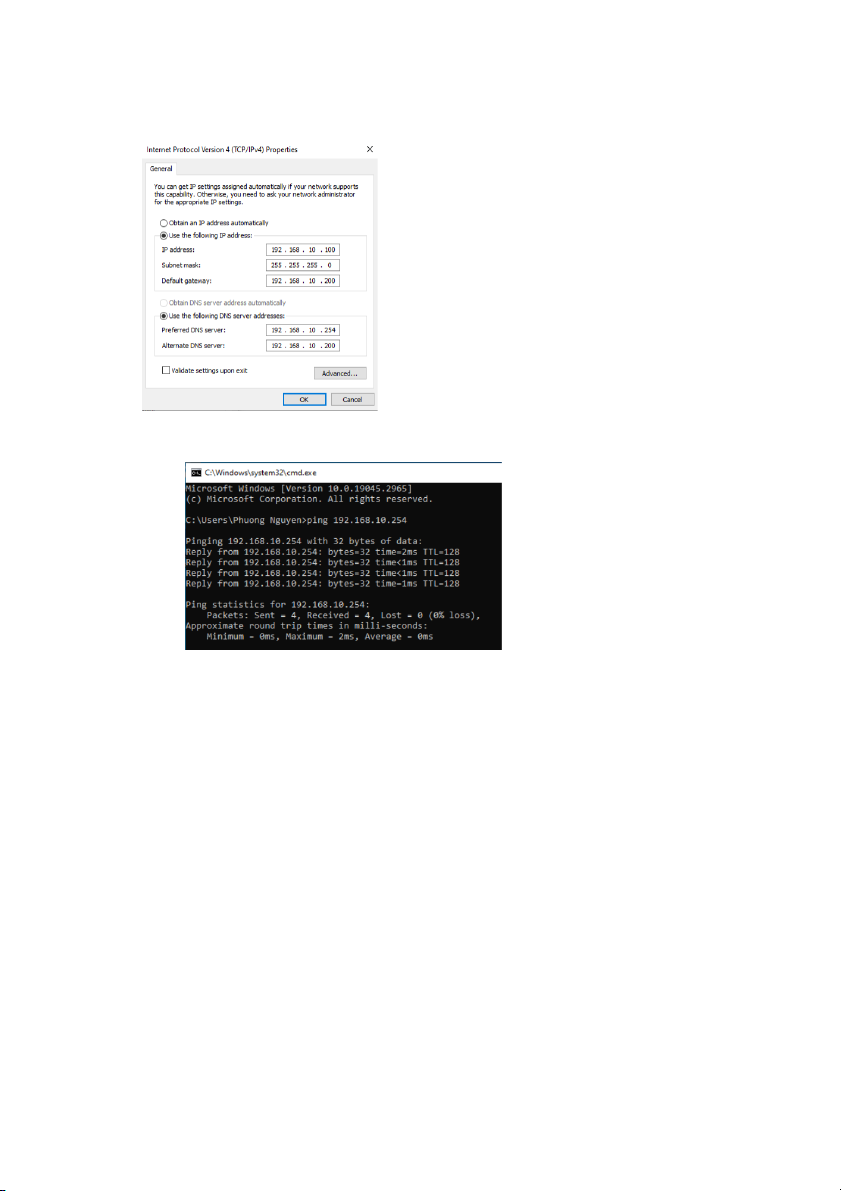
Cấu hình IP cho Windows 10
Tiếnhànhpingthử2máy:
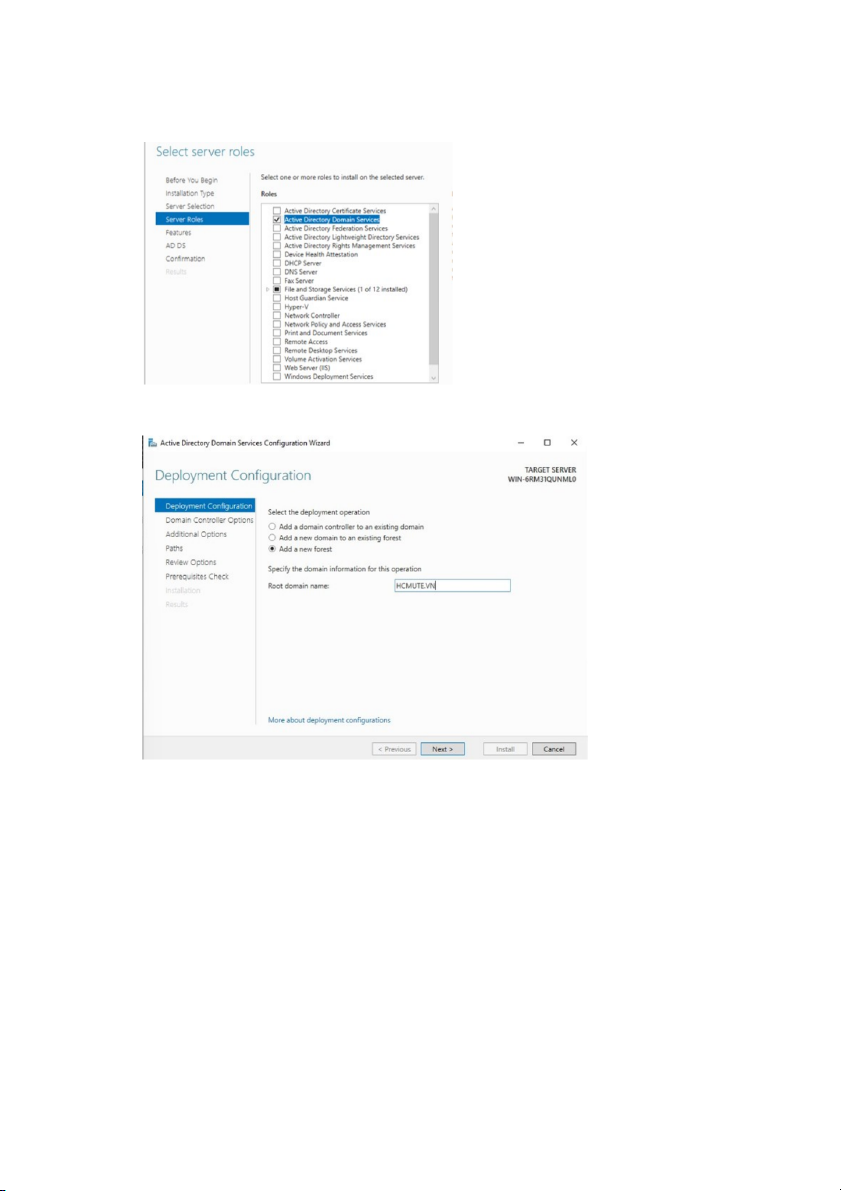
Bước 2: NângmáyServerlênthànhDomainController(HCMUTE.VN) vàtạomột
tàikhoản(testusesr)
- ĐầutiêntảiActive Directory Domain Services
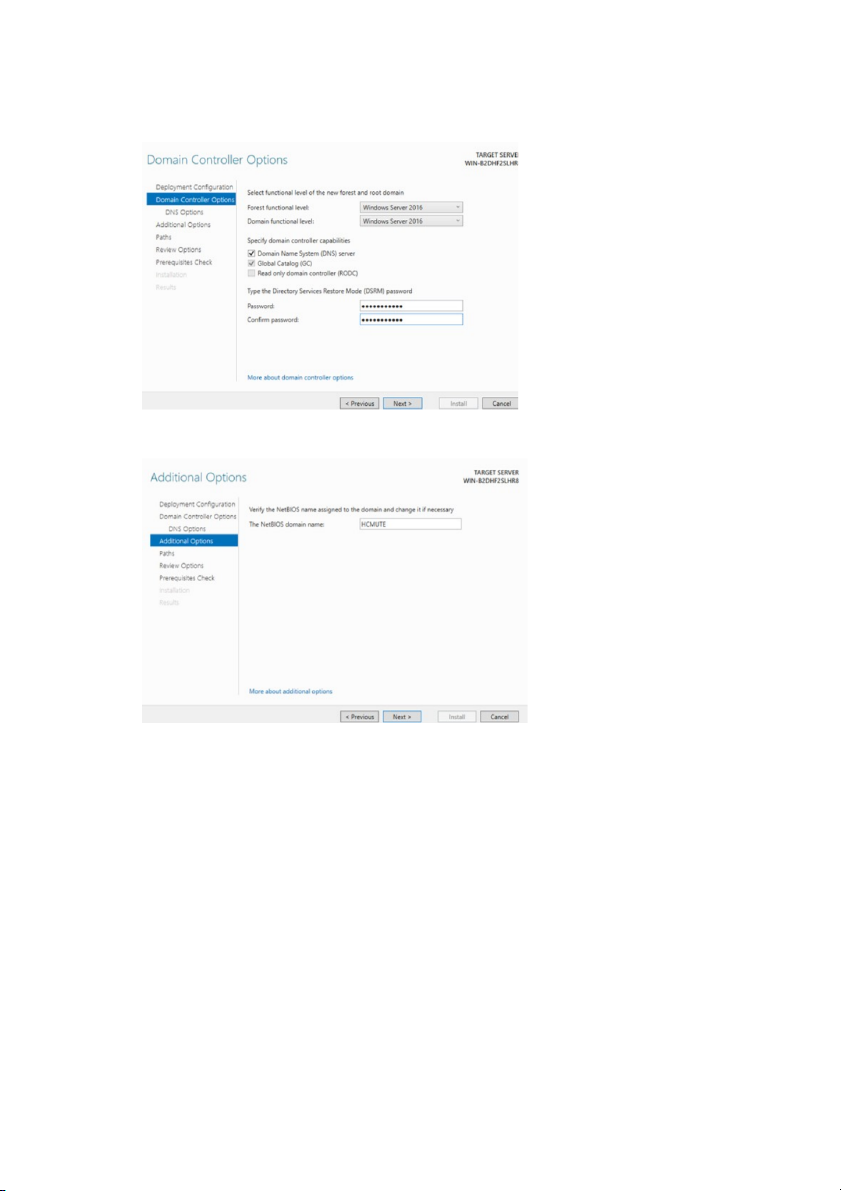
- SauđócấuhìnhDomain Controller -
CấuhìnhmậtkhẩuchoDomain Controller: -
HiệnraDomain Name:
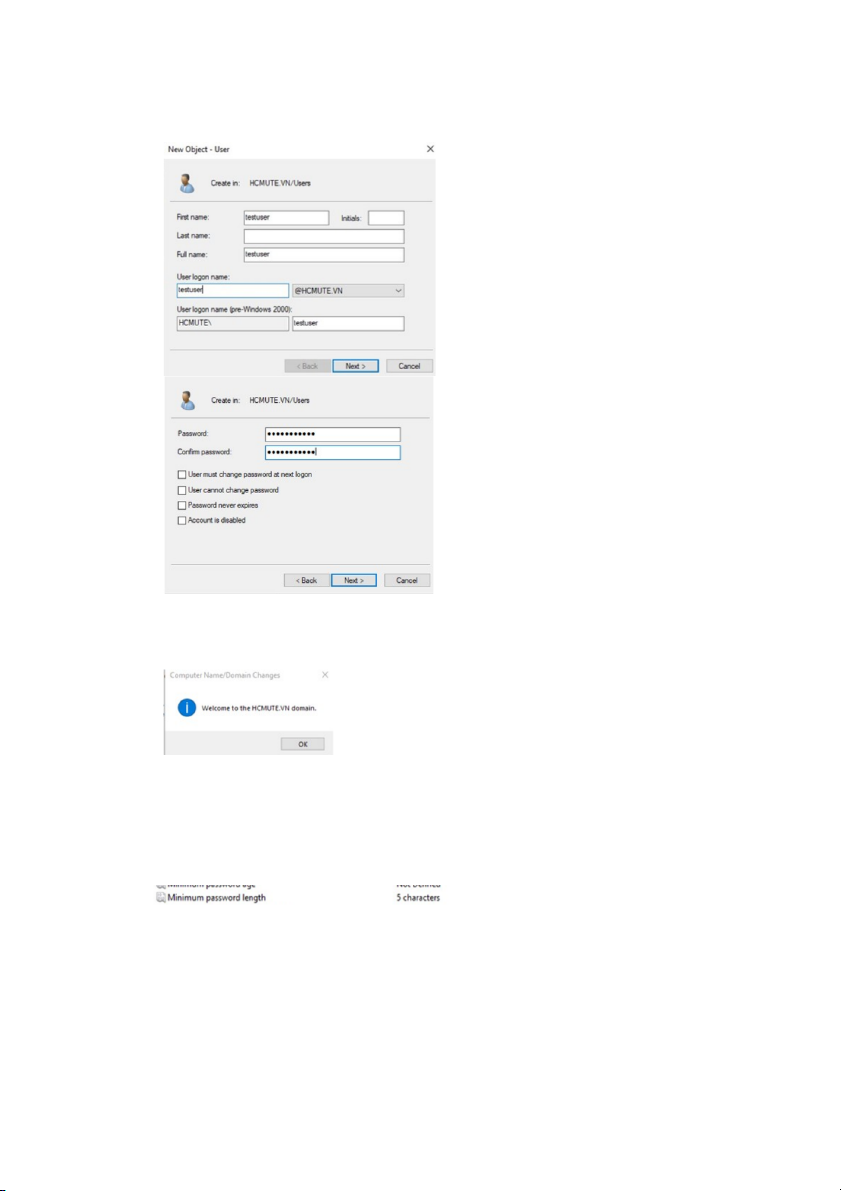
Bước 3: ChoPCgianhậpvàoDomainController(tài khoản : testuser)
- Đầutiên,tạotàikhoảntestuser:Tools → Active Directory Users and Computers
→ HCMUTE.VN → Users → bấm chuột trái → New →User. Sauđónhậpthông
tintàikhoảntestuser vàpassword.
- ChoPC (Win 10)gianhậpvàoDomain Controller:System →Advanced system
settings → Change → Chọn Domain: HCMUTE.VN → OK → Đăng nhập tài khoản đã tạo ở trên
Bước 4: CấuhìnhchínhsáchmậtkhẩutrongDomain Controller
- Đểcấuhìnhchínhsáchtathựchiện:Tools →Group Policy Management Editor →
Domains → HCMUTE.VN → Default Domain Policy → Edit → Computer
Configuration → Policies → Windows Settings → Security Settings → Account
Policies → Password Policy.
- Sauđóchỉnhnhữngchínhsáchtươngứngmàmìnhmuốnchỉnh
VD: Chỉnhpasswordlengthsang5.
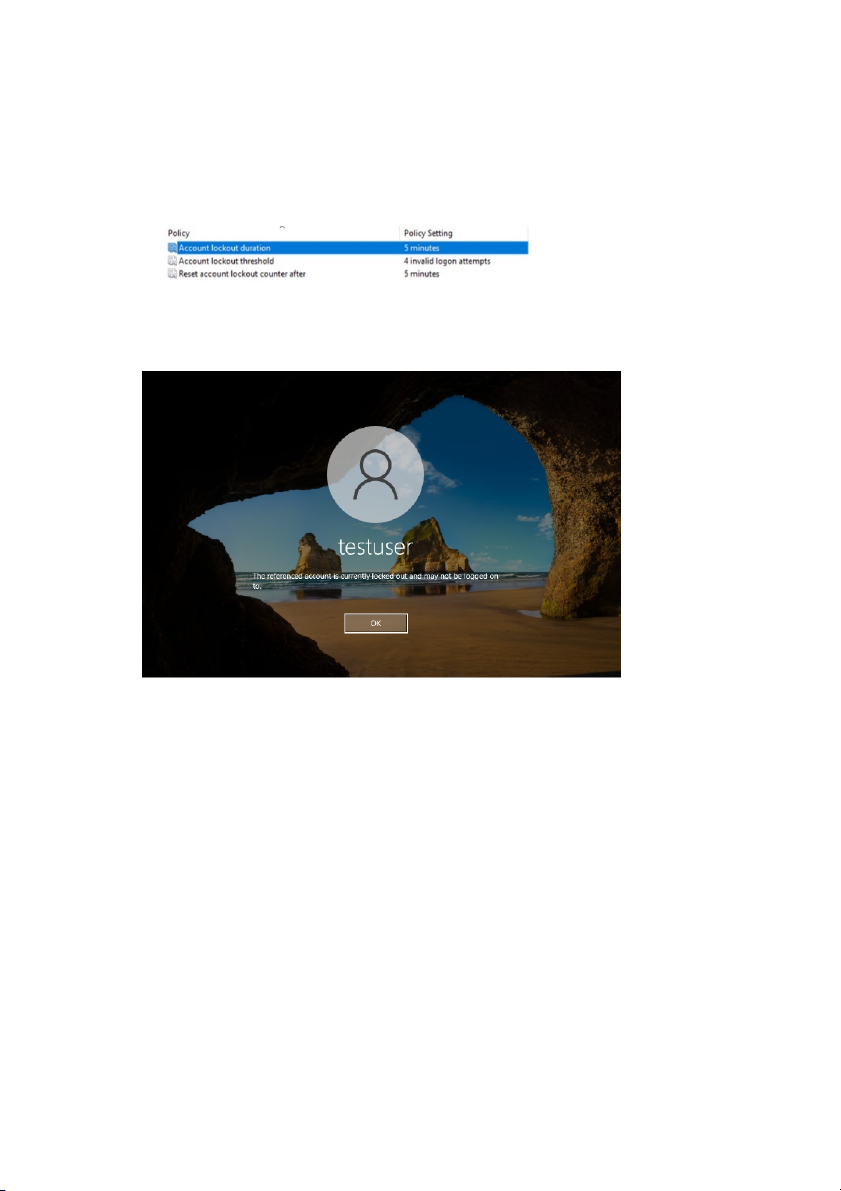
- ChỉnhAccount lockout threshold lên4(Khinhậpsaimậtkhẩu4lầntàikhoảnsẽbị khóa)
- Accountlockoutduration:thờigiankhóalà5phút.
Bước 5: Xácthựccácchínhsáchcấuhìnhởmáyclient
ÁpdụngchínhsáchAccountlockoutthreshold(nhậpsaimậtkhẩuquá4lầnthì thựchiệnkhóa).
Thờigiankhóalà5phút.
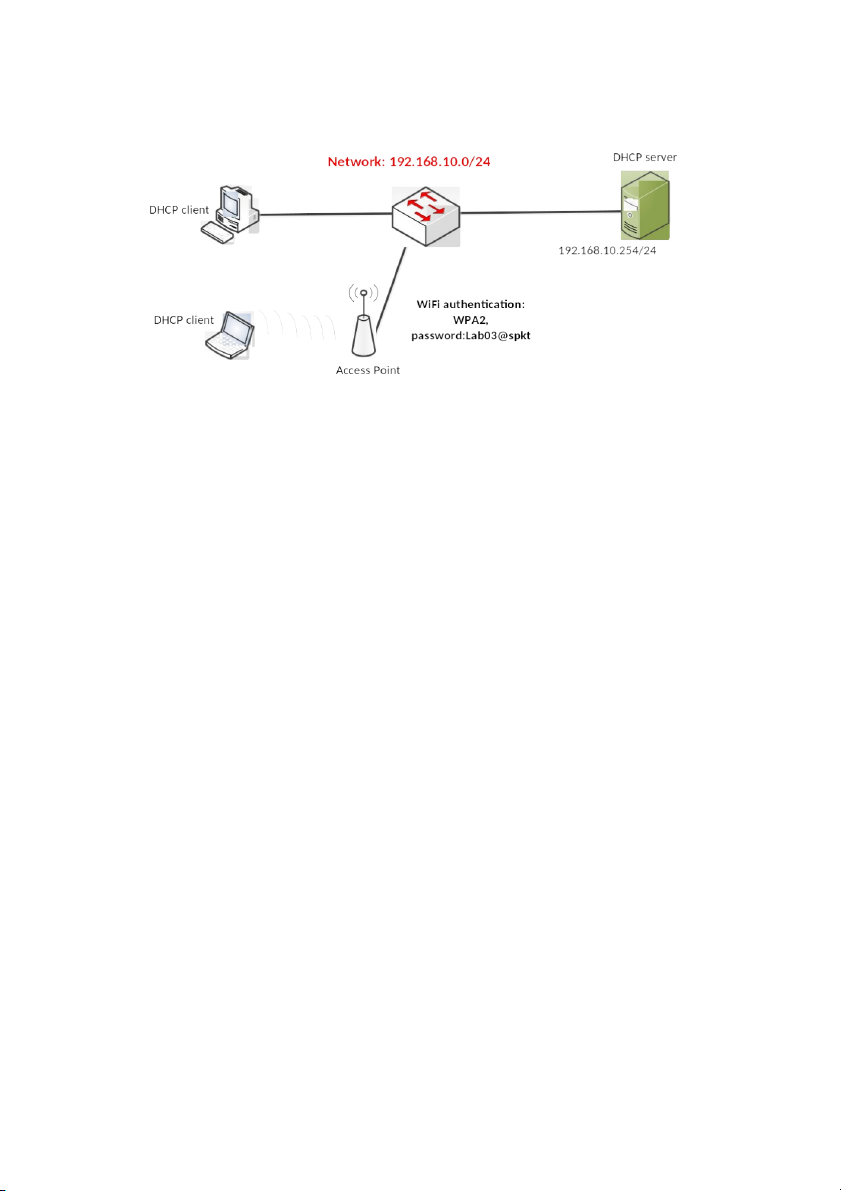
2. WiFi authentication (WPA2) Networktopology
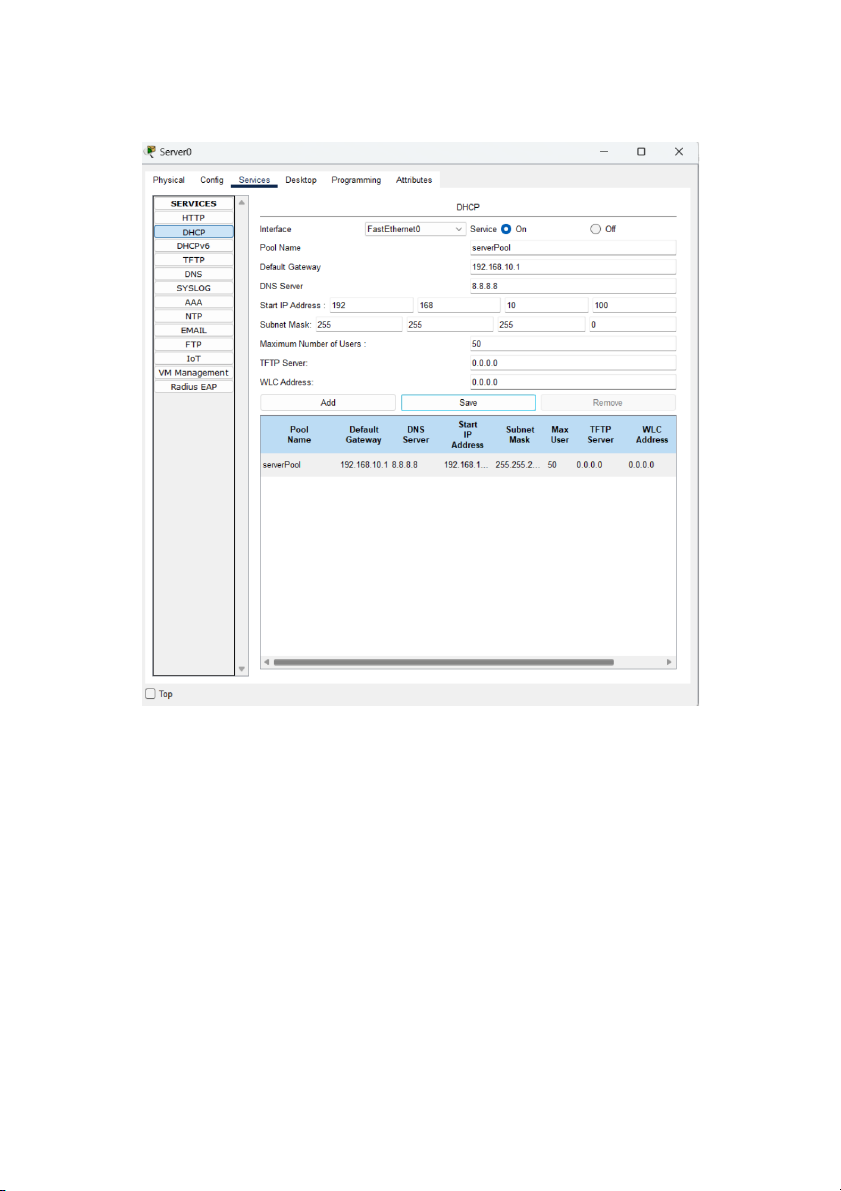
Step 1. Configure DHCP server - IPaddress:192.168.10.254 - DHCPserver: o Network:192.168.10.0/24 o
IPrange:192.168.10.100–192.168.10.200 o
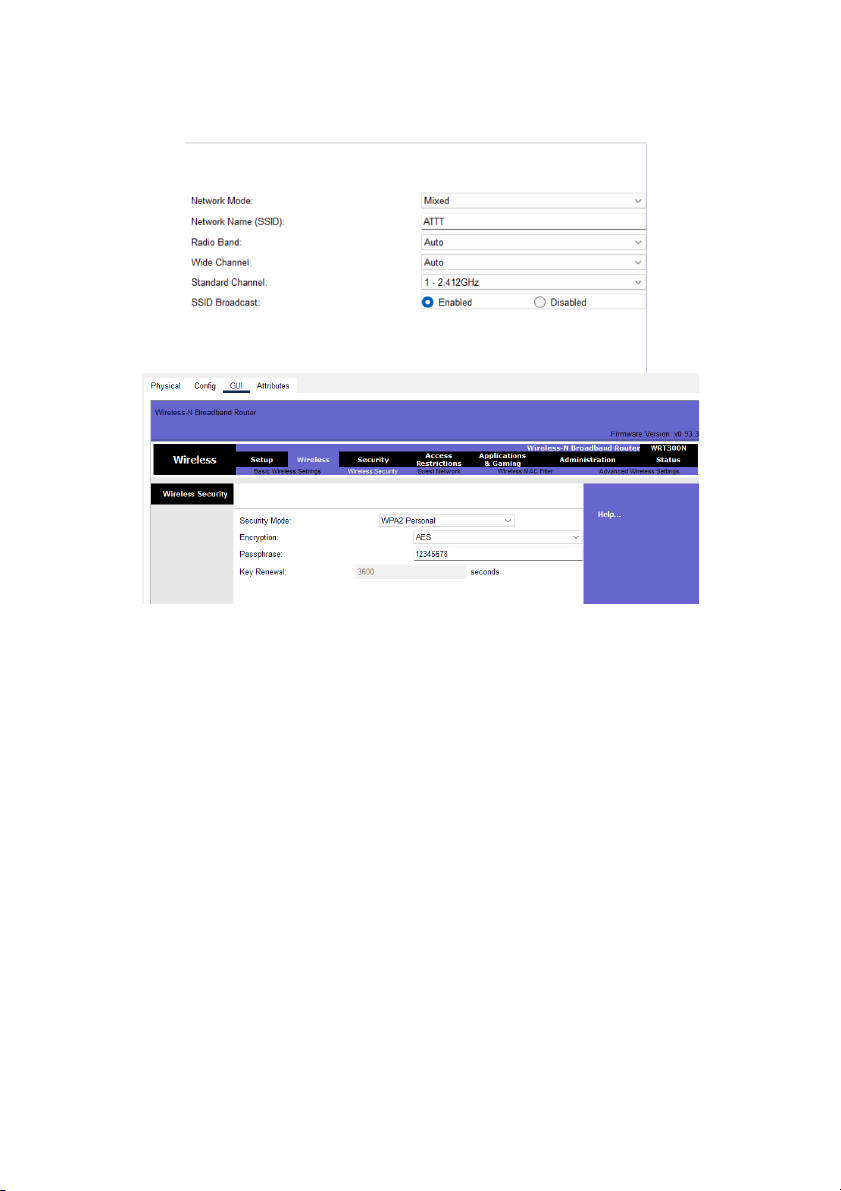
Defaultgateway:192.168.10.1 o DNS:8.8.8.8 Step 2. Configure AP - SSID:ATTT -
Authentication:WPA2–Personal - Password:12345678
Step 3. Verify the configuration
TestontheLaptop:IPaddress,pingtootherPCs.
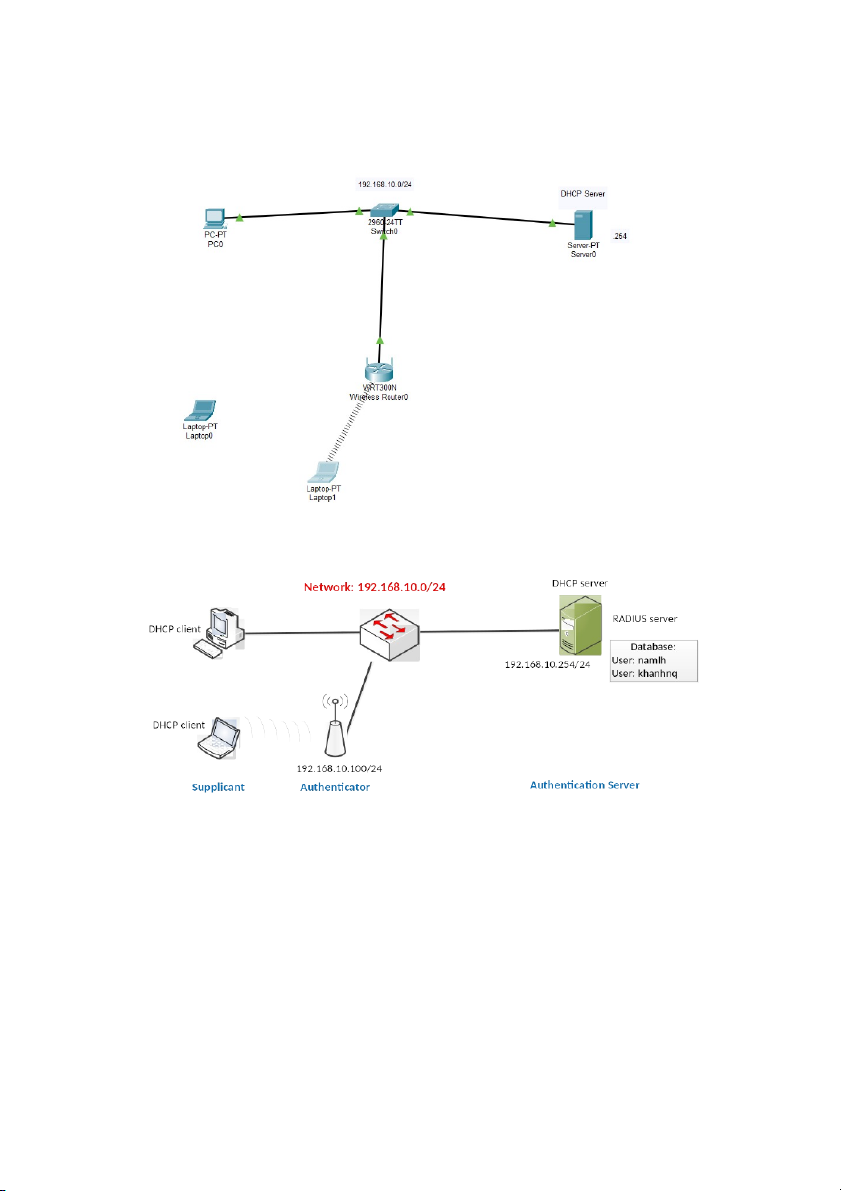
3. Authentication with Radius server (802.1X) Networktopology:
Labenvironment:Cisco Packet Tracer
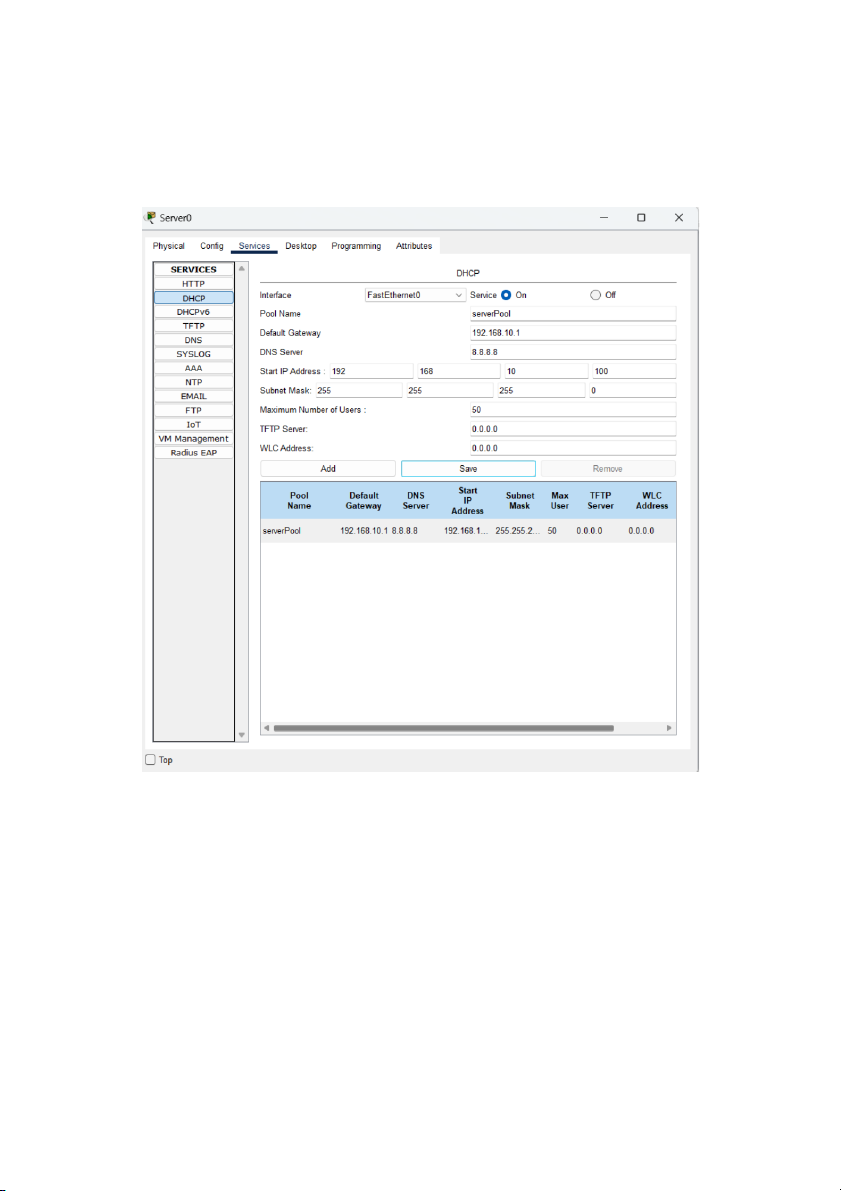
Step 1. Configure IP address & DHCP server -
DHCPserver:192.168.10.254/24 - ConfigureDHCPserver o Network:192.168.10.0/24 o
IPrange:192.168.10.100–192.168.10.200 o
Defaultgateway:192.168.10.1 o DNS:8.8.8.8
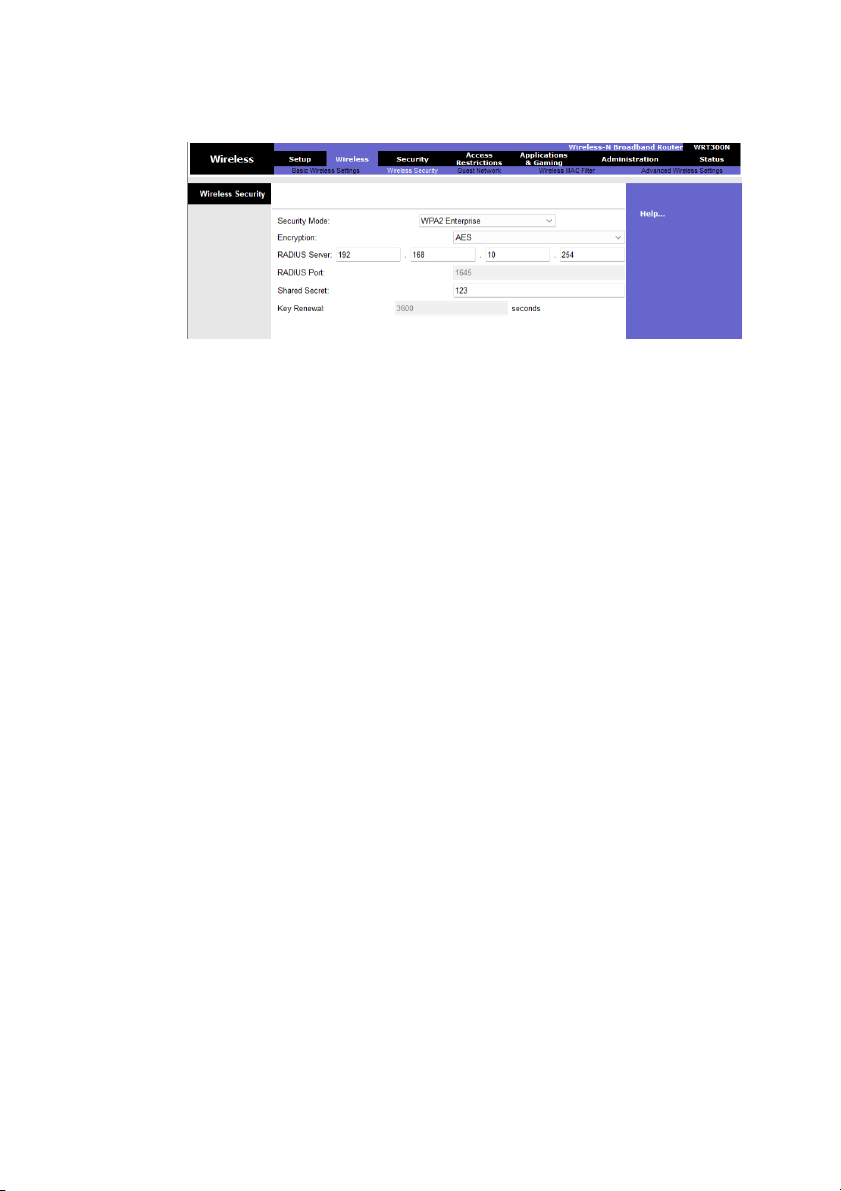
Step 2. Configure AP’s IP address -
AP’sIPaddress:192.168.10.250/24 - SSID:ATTT -
Authentication(radiusserver):WPA2–Enterprise
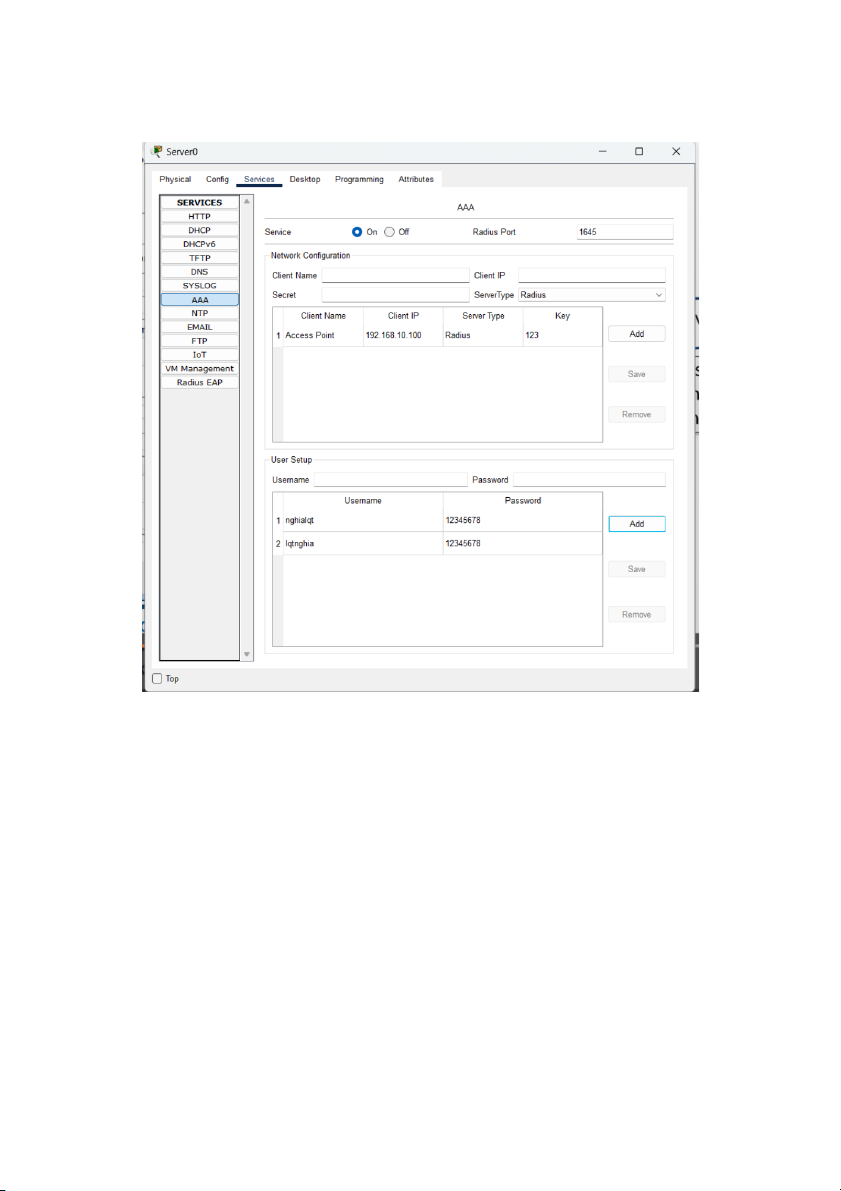
Step 3. Configure RADIUS server -
SettheIPaddressoftheRadiusclient(theauthenticator–AP’sIPaddress) - Setthekey-ID - Createaccounts
Step 4. Configure RADIUS client ( authenticator) on the AP -
SettheIPaddressoftheRadiusserver -
Setthekey-ID(thesameasKey-IDontheRadiusserver)
Tài liệu liên quan:
-
Quy định xử phạt vi phạm hành chính trong lĩnh vực an ninh mạng | Lý thuyết môn an toàn thông tin mạng Trường đại học sư phạm kỹ thuật TP. Hồ Chí Minh
487 244 -
Chương 2: thực trạng và những phương pháp trong công tác đấu tranh phòng chống tội phạm mạng | Tài liệu môn An toàn thông tin
320 160 -
LAB 2: Quét mạng (scanning networks) | Báo cáo bài thực hành môn An toàn thông tin Trường đại học sư phạm kỹ thuật TP. Hồ Chí Minh
518 259 -
LAB 2: Buffer Overflows - Bùi Đức Thắng | Báo cáo bài thực hành môn An toàn thông tin Trường đại học sư phạm kỹ thuật TP. Hồ Chí Minh
615 308 -
Lab 5. SQL Injection | Tài liệu Môn an toàn thông tin Trường đại học sư phạm kỹ thuật TP. Hồ Chí Minh
370 185